rangifer’s diary: pt. ci
Improving rangifer’s diary
Recently, I’ve been looking at some changes that I can make to improve my diary entries and the way in which they are rendered — particularly, to HTML. Some of these changes can be done all at once, and in other cases, slowly but surely. Many such changes are only necessary because of technical debt incurred as a result of trying to crosspost my diary entries onto various forums. Here, I’m going to give a brief (let’s be real; it’s not going to be brief) overview of the changes that I’ve worked on so far.
Improved image loading behaviour
My diary entries frequently contain many images. These images are, ultimately, presented to the user via an <img> element. As a result of the way in which I write my diary, each such element has the following three attributes:
src, which gives the path or URL to the actual image data.alt, which is a textual description of the image. This is the essential data associated with the image that will be used in addition to, or in place of, the image itself. In many cases, I make thealttext quite brief, because the surrounding text of my diary contextualises it enough; in other cases, however, I may even use it to provide a full transcription or similar.title, which is actually an attribute that you can put on very nearly any HTML element. It’s not super useful, but visual browsers typically display it as a tooltip by default, when the user hovers their pointer over the element. Also, Markdown (the language that I write my diary in) admits special built-in syntax for setting thetitleof an image. So I just set this to the same text as thealtattribute, for the benefit of anyone who might look for thetitlebefore looking for thealt.
And that’s it. By default, visual browsers (particularly browsers like Firefox, Chromium, Safari, etc.) typically assume that images are Very Important™, and will greedily commit resources to download, decode, and render them as soon as possible. This is basically the wrong idea, for my diary. Yes, the images are important, but the reader (the user of the browser) only needs this expensive stuff to be done when they get to the relevant portion of the diary entry — if they ever even get there at all. If this is a little too sluggish, it’s not the end of the world; the alt text can suffice in the meantime.
In order to let the browser know this information, we can add two more attributes alongside the three listed above:
loadingcan be set to"lazy", rather than leaving the default value of"eager". This encourages the browser to not even attempt to download the image data until it’s reasonably certain that the user will need it.decodingcan be set to"async", rather than leaving the default value of"auto"(or setting it to"sync", for that matter). This is less important than theloadingattribute, but it does give a hint to the browser that it can decode the image whenever — just in case decoding the image might stall the browser’s ability to render other stuff.
Easy, right? I can just slap these two bad bois on every <img> and call it a day. Well… not quite. There are a few complications here.
For one, now that I set loading="lazy", I’m going to also want to set the width and height attributes as well. This is because, if the browser waits a while before deciding that it’s time to actually download some image data, it will have already laid out most of the webpage before then. Without any image data, the browser has no earthly idea what the size of the image is going to be like! So when the images do finally get downloaded, they’re going to suddenly take up a bunch of space, moving other stuff out of the way. This is Bad User Experience™, because it looks like shit, animates things for no reason, and makes things harder to read. Providing the width and height attributes in the HTML itself fixes this issue very simply, because they can just be set to the actual width and height of the image data.
But, okay. That means that I just need src, alt, title, loading, decoding, width, & height attributes on every <img>, and I’m good to go. Right? It’s a lot of attributes, but that’s okay, because the computer will do it for me. 🙂
Yeah? Go ahead, computer. Do the thing. I’m waiting.
…
Alright, it didn’t work. I gave up and decided that I needed to run my own custom postprocessor on the HTML that’s generated by Zola (the static site generator that I use for my website). This postprocessor would have to walk through each diary entry’s HTML file byte by byte, looking for <img> elements, and then carefully, surreptitiously insert the appropriate loading, decoding, width, and height attributes, all whilst keeping the entire rest of the HTML (including the rest of that <img> element) untouched. Note that this also means that the postprocessor has to know what values width and height should have!
I did exactly this, and you can find the code here. I won’t copy-&-paste the whole thing here (partly because it’s embarrassing), but maybe these two lines will give you a little taste:
/// epic-level hacky garbage
async fn munge_html(path: PathBuf) -> Result<()> {
See that sneaky lil async there? You see, originally, this program ran just with normal synchronous code. It calls out to the identify command — which is part of ImageMagick — in order to determine the width and height of each image. This works really well; so well, in fact, that it gives the exact answer that I want, even for SVG files! The problem was that it made my program take approximately forever to run. I think identify has to launch Inkscape every time that you pass it an SVG, and also it makes kactivitymanagerd bust its ass for no reason — it’s a mess. Making all of this stuff run asynchronously actually helped quite a bit. Phewf. 😅
There’s also the slight issue that the width and height attributes can affect the presentation, because they implicitly set the width and height CSS properties for that element. So I also had to tweak my website’s CSS. [':
But it works!! And it is ✨glorious✨.
Footnotes that actually fucking work (hopefully)
Denial
The footnotes that I put in my diary entries have evolved over time. At first, I never really had a use for them. Then, I would occasionally have one here or there — just an asterisk in the main text, and an asterisked paragraph below. Later, I started having more elaborate footnote sections, each one enclosed in a <details> element; this required getting a little creative with the sigils used to mark footnotes (see: footnotes.md). And finally, with the freedom gained by divorcing myself from crossposting to mediocre forum software, I moved away from using various footnote sigils, in favour of the saner superscript square-bracketed numbers. Like this.[1]
Anger
The problem with the way that I’ve done footnotes up until now is that it’s Not Good™. Like, typographically, it’s great. Textually, it’s peachy. Hypertextually, it makes me die a little inside. Like, am I really asking the reader to observe a footnote marker, scroll all the fecking way down, open the corresponding <details> element, read the footnote, and then scroll all the way back up to wherever the hell they were just reading from? Yes, this can be improved by, say, opening the entry in two tabs simultaneously to reduce the necessity of scrolling. But like, no…? Plus, what the bloody hell are we out here thinking <a> elements are for? What does a11y stand for again??
Really just a complete mess.
Bargaining
So it’s time to fix that shit. Is this going to involve me writing another shitty script again? Yes. Yes it is. You can find said awful computer code here. Basically, instead of carefully combing through HTML and trying to insert stuff whilst keeping everything else untouched, this is doing the same thing… but with the original Markdown itself. In the Markdown, I manually write a footnote marker that looks like this:
<sup>\[1\]</sup>As I am accustomed to doing. Then, at some point later in the document, I write something like:
<details>
<summary>Footnotes for “Section name goes here”</summary>

1. Sup binch. Bet u didn’t expect to get sassed by a footnote, huh?

</details>
Then, I can run my cursed program on the Markdown file, transforming it into something like this:
<sup><a href="#fn-3-1" id="fnm-3-1">\[1\]</a></sup>[…]
<details>
<summary>Footnotes for “Section name goes here”</summary>

1. <a href="#fnm-3-1" id="fn-3-1">\[↑\]</a> Sup binch. Bet u didn’t expect to get sassed by a footnote, huh?

</details>
Here, fn stands for “footnote”, and fnm stands for “footnote marker”. The first number (3, in this example) is the footnote group number; each footnote grouping (corresponding to a single footnotes <details> element) is numbered from 1 upwards, starting at the beginning of the document. And the second number is, of course, the footnote number (also numbered from 1 upwards). Within a given footnote grouping, only the first appearance of a given footnote marker can get the id attribute, as ids must be unique. The second and later appearances could just get their own distinct ids, but the whole point of the id is to allow the footnote to link back to the footnote marker, so it wouldn’t be of any use unless I wanted to allow multiple such link-backs for a single footnote.
Anywho, the basic idea is simple: when you observe a footnote marker in the main text, you can follow its hyperlink to go to the corresponding footnote. Moreover, you can follow the hyperlink of the “[↑]” at the beginning of the footnote to go back to the corresponding footnote marker. Ta-da! Beautiful.
There are still some issues, though. For one, many (all?) browsers will not allow you to follow a hyperlink to a URL fragment if the corresponding element (the element whose id is equal to the fragment) is inside of a closed (i.e. not open) <details> element. I don’t claim to have absolute knowledge of the HTML standard, but I suppose that this is because <details> elements that are not open are not supposed to have their contents in the DOM; instead, just the <details> node itself, with possibly a single <summary> child node, is supposed to be in the DOM. Then, when the user agent sets the <details> node to be open (because the user attempted to open it, or it was programmatically opened by some JavaScript, or whatever), the DOM is manipulated to insert the appropriate descendants of the <details> node.
That’s not great!! But I mean, I can kinda fix that, right? What if I just had a little JavaScript that would automatically open the appropriate footnotes <details> element when the user navigated through a footnote marker’s <a>? So I did exactly that. It looks like this:
function openDetails(ev) {
    const details = document
        .getElementById(ev.currentTarget.getAttribute("href").slice(1))
        .closest("details");
    if (!details.open) {
        details.open = true;
    }
}

function watchFnMarkers() {
    document
        .querySelectorAll('a[href^="#fn-"]')
        .forEach(a => a.addEventListener("click", openDetails));
}

if (document.readyState === "interactive") {
    watchFnMarkers();
} else {
    document.addEventListener("readystatechange", () => {
        if (document.readyState === "interactive") {
            watchFnMarkers();
        }
    });
}
Not bad, right? Only like ≈14 SLOC or so. And it seems to work like a charm!
Depression
Actually, yes. It is bad. Relying on JavaScript (even a very smol quantity of polished, single-purpose code) for basic functionality that should be provided by the hypertext itself is to be in a state of sin. Yes, all of the necessary information is technically in the hypertext itself (that is, ignoring all JavaScript/CSS), but because of the fucky way that <details> is designed, this kind of arrangement is inappropriate. But don’t take it from me — the HTML standard itself is extremely clear on this point, even specific to my use-case:
The
detailselement is not appropriate for footnotes. Please see the section on footnotes for details on how to mark up footnotes.
This is how much of a disaster I am. Even the HTML standard knows exactly what I’m doing and why everything that I do is wrong. Why do I even try?
Acceptance
The <details> element is not appropriate for footnotes. Furthermore, many of my diary entries still use the old sigil-based footnote marker system, and I have no way to programmatically fix those.
It’s going to be a lot of work, but I can do it. Slowly but surely…
This is going to require manual intervention to:
-
Convert the usage of
<details>for footnotes (not the usage of<details>for other purposes, which will have to instead be addressed by the “Revisiting & editing old entries” section below) into a heading-based system that is actually semantically correct. The HTML standard has this to say:For longer annotations, the
aelement should be used, pointing to an element later in the document. The convention is that the contents of the link be a number in square brackets.And, in the given example, the footnote is within a
<section>element, with a short link back to the footnote marker. This is great, because it’s basically exactly what I’ve been doing, but without the incorrect usage of<details>. So I just need to convert such<details>elements into the equivalent sections. I don’t use<section>(which is a pretty generic element anyways) in my diary, instead simply using the hierarchy of<h1>〜<h6>elements to break the document into sections.<section>s are already supposed to have headings anyways, so they would be kinda redundant here. That makes the switch to a heading-based system simple & clean, in principle. Using the example from above, we would transform this:<details> <summary>Footnotes for “Section name goes here”</summary> 1. <a href="#fnm-3-1" id="fn-3-1">\[↑\]</a> Sup binch. Bet u didn’t expect to get sassed by a footnote, huh? </details>Into something like this:
### Footnotes for “Section name goes here”

1. <a href="#fnm-3-1" id="fn-3-1">\[↑\]</a> Sup binch. Bet u didn’t expect to get sassed by a footnote, huh?
One issue, however, is that the number of
#s (in this case, 3:###) matters, because it corresponds to the heading level[2] (in this case, 3:<h3>). If the heading level of the section that this footnotes section corresponds to (in this case, the section is calledSection name goes here) is 𝑛, then the heading level of the footnotes section must be (𝑛 + 1). Any other heading level will produce the wrong “document outline”, so to speak.There are subtle issues here (which I won’t get into) that can make doing this programmatically… complicated. More complicated than you’d think.
Thankfully, I already went and did it — yes, all ≈200 of them… — by hand! (With a little help from regex find-and-replace…)
-
Convert that shitty script to work with headings instead of
<details>elements, so that it still works on current & future diary entries (and on revised old entries). -
Manually fix each individual old footnote that used the sigil-based system, converting it to the superscript square-bracketed number system, and then running the ✨new✨ shitty script on it to hook up them
<a>s. 🫠🫠🫠
It’s fine. I’m fine. I accept my fate.
A proper Atom 1.0 feed
Back in pt. xc of this diary, I mentioned that you can track some of the progress made on my diary (e.g. if you just want to know when a new entry is released) via the use of Atom and/or RSS feeds provided automatically by Codeberg for git repos hosted on their service.
That’s cool & all, but probably not actually what you wanted. What you probably wanted was an actual Atom/RSS feed dedicated to my diary, that tracks just the diary entries themselves. Luckily for me, the static site generator that I use for my website — viz. Zola — has built-in support for generating Atom/RSS feeds.
At first, I thought that it might actually be really easy! It sort of is. In the config.toml for a Zola site, you can set something like:
generate_feed = true
feed_filename = "atom.xml"
And Zola provides a built-in template called atom.xml (also, another called rss.xml, if you want to use RSS instead) that will grab up all pages on your site that have dates associated with them, and shove them into the automatically-generated Atom (or RSS) feed.
This is where I ran into the first issue: the pages in my Zola site for my diary entries do not have dates associated with them, so the Atom feed just doesn’t get generated at all! The way that I fixed this was by adding a little file called .date into the root directory of each diary entry. Each .date file just contains a single line of text, with a date formatted like: 2021-01-07. I automatically generated these .date files by looking into the git commit history to see when the first commit was made that included the README.md (the main text) for that entry. By reifying them as actual files, this expensive git-history-searching doesn’t have to ever be repeated, and the dates can be manually adjusted if necessary (which was already necessary once). Then, when doing the preprocessing (⟨pre⟩ meaning “before Zola actually runs”) of my diary entries for the purpose of building my website, I can read each .date file and inject its contents into the front matter of that diary entry’s Markdown data. The injected front matter looks something like:
+++
title = "rangifer’s diary: pt. i"
template = "diary_entry.html"
date = 2021-01-07
+++
With this, the Atom feed is actually generated now! It seems fine, and includes all & only diary entries.
However, I was unsatisfied with the built-in template. Not only did I have a lot of nitpicks (after having read, like, some of the Atom 1.0 specification and stuff like that), but there was one glaring issue: it was including the entire content of each diary entry as part of the feed itself, and doing a poor job of it, too. The diary entry content was mangled in a way that I’m not sure is actually fixable (beyond writing yet another garbage script to postprocess it…), but that’s okay, because I didn’t want it anyways. Including the entire content of the diary entries would make the feed itself (which is just a single XML file, mind you) enormous, and take forever to upload/download. Plus, it would have to also be tracked by git, which is just a nightmare.
Plus, there’s no real reason to include that content in the feed when it’s on my website (which is serving the feed in the first place…) anyways! So I wrote a custom template, which you can find here. This template produces a beautifully-formatted Atom 1.0 feed that is 100% valid according to the Atom 1.0 specification, and which contains all of the necessary information.
Get the Atom feed here!! Please subscribe!!!
nofollow noreferrer
This particular change is quite trivial, but I thought I’d mention it anyways. Zola now offers options in the config.toml that can be turned on like so…:
external_links_no_follow = true
external_links_no_referrer = true
…To basically just add a rel="nofollow noreferrer" attribute to the links (<a>s) found in Markdown files. I don’t know if this works when there’s a literal <a> in the Markdown itself, but whatever. I figured it’s worth turning on, since it’s that easy. :P
Revisiting & editing old entries
And finally, the really big one. My writing discipline has improved over time, and that includes some technical details as well. As a result, looking back at my older diary entries, I am saddened by their depressingly bad formatting, lack of a11y, typos, grammatical errors, orthographical mistakes, and so on.
So, I started by manually combing through five entries per day, starting with pt. i. Five per day is a pretty good pace, but it’s unlikely that I can keep this up as the entries get individually lengthier. Also, I can guarantee you right now that I cannot catch every issue in this way. It would just take too fucking long. I only take as long as I need to fix the glaringly obvious issues, and to also adequately satiate whatever insane desire I have to fix all the shit. All the shit. Am I a little sad that I can’t literally fix everything? Yeah. But you know, that’s life.
Here’s a little taste of just a smol number of things that I fix during this process:
- Missing image transcriptions. Some of these images out here really need transcriptions (like, hello? Sometimes the image is literally just text??), and they just don’t have ’em. That is not good.
- Spelling errors. Some of these errors pre-date my adoption of Aspell, which explains a lot…
- Incorrect usage of HTML elements.
- Inexplicably missing or misused/abused punctuation.
- Unreadable source code. For example, putting invisible characters — like, Unicode codepoints that have no actual visual display of their own, e.g. U+fe0f — literally into the Markdown source. What the hell?
- Linking to the list of odd jobs on the Oddjobs website, when linking to Introduction To Odd Jobs would be better.
- Unreadable writing. Sometimes, a sentence just does not work. It needs better grammar. It’s hurting my brain.
- Misleading information. In some cases, I have to resort to putting little “editor’s notes” to correct myself when I get something kinda wrong. Or, maybe the statement was true at the time that I wrote it, but things have since changed. Or, maybe I simply neglected to mention something.
- Footnotes in the wrong format. As discussed in the “Footnotes that actually fucking work (hopefully)” section above, older diary entries do not use the correct superscript square-bracketed number format for footnotes.
- ⋮
🫠🫠🫠
Footnotes for “Improving rangifer’s diary”
- [↑] Hi hello, welcome to footnotes. How are you doing? With some luck, you might be faring better mentally than I am at the moment. I’m pretty much just talking to no one in particular right now. Talking to oneself is typically frowned upon, but when I do it, I make sure to word it very, very carefully, and format it all nice. That way, I’ll be able to more clearly read what I just wrote. Then, I publish it on the WWW as an exercise in self-humiliation. Is that weird?
- [↑] A.k.a. heading rank.
Zerk + SE = ???
It’s fairly commonly understood, amongst players of pre-BB MapleStory versions that have 4th job, that dark knights (DKs[1]) benefit from SE by a disproportionately large amount. Of course, they don’t benefit as much as a class that already has a passive source of critical hits (e.g. any archer, an assassin/hermit/nightlord, or even a marauder/buccaneer who is attacking a stunned target), & we’ll more clearly see why that’s the case once we look at how SE works. But that’s not the point; most classes lack passive sources of critical hits, so we accept classes that do have passive crits as being ✨special✨ w.r.t. SE. DKs, on the other hand, are just dumb[2] warriors who are obviously critless; & yet, they seem to get so much extra DPM from SE! Why is that?
Previously, I tacitly believed that the answer to this question was something like this:
- When using Crusher, the DK’s per-line[3] damage multi[4] is relatively low, at just 170%.
- Berserk is an aftermodifier[5], which means that it interacts favourably with SE, due to the order in which damage calculations are performed.
At first blush, this sounds like a plausible explanation. As we’ll see, the first item (relatively low per-line dmg-multi) is certainly part of the answer. What is less clear, however, is whether the second item (Berserk being an aftermod) is actually relevant. I think that I heard something like this second item a long time ago, & may have accepted it as fact without actually working through the mathematics. So, I want to carefully step through said maths, & see if I can’t figure out what’s actually going on here. Maybe I was right this whole time, or maybe I should have done this earlier…
The order in which damage calculations are performed
In the previous section, I mentioned “the order in which damage calculations are performed”. What is that order, exactly?
For the purpose of this exposition, I’m going to ignore clamping & rounding. Normally, there are certain points in the calculation process where you must clamp values to be valid damage values: if the damage is below 1[6], then it is clamped to a value of exactly 1; & if the damage is above the damage cap[7], then it is clamped to be the same as the damage cap. We will also obtain intermediary results that are not integers, & that will thus require rounding at some point(s). However, these are technical details irrelevant to the overall order of damage calculation, so I am omitting them for simplicity.
Here is the order in question:
Command used to generate the above diagram
mmdc -b transparent -t dark -i dmg-calc.mmd -o dmg-calc.svgSee mermaid-cli.
Again, the exact technical details of how to produce the damage number bit-by-bit are not super relevant here (we’ll be letting my damage calculator do that kinda stuff), but we do need to explain a little about what each of these damage calculation phases does — in order:
- Raw dmg range
-
This phase is closely related to the damage range that you see in your “Character Stats” window, but is not always the same. The reason for this is that your actual raw damage range can depend on your attack animation (swinging vs. stabbing; which itself depends on the skill/basic-attack used to attack, what weapon you’re using, & RNG), as well as depend directly on the skill that you’re using to attack. An obvious example is magical attacks, which clearly don’t use any kind of physical damage range; but other examples include L7 & Roar.
In many — albeit not all — physical-attacking cases, the calculation of raw damage range looks at the following kinds of stats:
- Your primary stat (e.g. STR in the case of a spear).
- Your PSM, which directly multiplies your primary stat. This usually depends on weapon type & attack animation.
- Your mastery, which also multiplies your primary stat. This usually depends on weapon type, but can depend on some other stuff as well.
- Your secondary stat (e.g. STR+DEX[8] in the case of a claw).
- Your total WAtk.
- Pre-DEF mods
-
Usually, this is CA/ACA, or WK/paladin elemental charges, or an interaction with the monster’s elemental weaknesses/resistances, or a bonus from some kind of Elemental Staff/Wand. Pre-DEF multipliers just directly multiply your raw damage range, as you’d expect.
- DEF reduction
-
This basically subtracts the monster’s DEF (WDef or MDef, whichever one applies) from your damage, after multiplying the DEF by a constant factor.
This can, however, also take into account your level relative to the monster’s level, but we will assume here that there are no significant level differences (read: your level is greater than or equal to the level of your target).
- Dmg multi
-
Your damage multi is calculated based on the skill that you’re using to attack, plus various other things that may modify damage multi — including, for example, crits. Then, once it’s all finished being calculated, it directly multiplies your damage at this point.
Note that although there may be many sources of damage multi, there is exactly one (1) grand-total damage multi value that actually gets used to multiply your damage. This is usually where people’s misconceptions about crits come from.
- Aftermods
-
There are various assorted aftermods that exist in MapleStory, & some of them are strictly less than 1, meaning that they lower your damage. Aftermods work exactly as you’d expect, directly multiplying your damage at this point. The only aftermod that we’re really concerned with here is Berserk.
- A single, actual dmg line
-
Once any aftermods have been applied, all steps have been completed, & the actual damage line is produced. Note that only one damage line is produced, so in general, we might have to repeat this entire process multiple times for just a single attack.
Comparing pre-DEF mod vs. aftermod
If you’ll recall, the main point of doubt here is about whether or not Berserk being an aftermod is actually relevant to SE greatly benefiting the DK. For comparison, the other 4th-job warrior classes (hero & pally) also have their own “modifiers” that apply to all of their attacks, as well. Just like Berserk, except that they’re not aftermods, they’re pre-DEF mods.
Thus, if Berserk being an aftermod is relevant, then it should be disadvantaged if we change it to being a pre-DEF mod like ACA, Holy Charge, &c. — at least, in the particular case of having SE. So let’s do that.
ℹ️ Want to skip the arithmetic? Go to the “Numerical comparison” section below.
The model
We’re going to make a model DK, but luckily, we don’t need all of the details, for our purposes. You might wonder if a model is even necessary at all, which is a good thing to be wondering at this point. Nevertheless, the “DEF reduction” phase (the 3rd phase in the “The order in which damage calculations are performed” section above) will subtract a virtually constant amount from the DK’s damage, which means that the rough absolute magnitude of the DK’s damage at that phase may be relevant.
Weapon & WAtk
The DK model will have the following sources of WAtk:
…For a total of 167 WAtk.
Stats
Our DK model is pure STR or nearly so, & is wearing reasonable equipment. They are level ≈170 or something like that, so their total stats — with MW20 or so — look roughly like this:
- STR: 1 000.
- DEX: 100.
The exact values here are not super important, as they are mostly just indicative of the DK’s level.
Skills
We’re worried about fighting bosses here, so we will simplify things greatly by reducing the DK to just Spear Crusher as their sole attacking skill. The DK has maxed all of the following skills:
- Spear Crusher.
- Spear Mastery.
- Spear Booster.
- Beholder.
- Berserk.
Maxing all of these skills requires ≥40 4th-job SP. This puts their mastery at 80%, & their weapon speed category at 4.
In MapleLegends, the exact value of Berserk’s aftermod varies continuously with the DK’s HP value (see: the “Berserkr” section of pt. xc of this diary & the “DK rev. 3” section of pt. xcix). Traditionally, Berserk has had an exact HP threshold, where the aftermod is 2 if the DK’s HP is below that threshold, & 1 otherwise. Nevertheless, in either case, 2 is a representative value for the aftermod, so that’s what we’ll use.
The DK is affected by max level (i.e. level 30) SE.
The monster
The monster is of the same level as the DK, & has 1 500 WDef.
Calculating with Zerk as an aftermod
ℹ️ Want to skip the arithmetic? Go to the “Numerical comparison” section below.
Phase 1: Raw dmg range
The raw damage range has a minimum & a maximum, which we can calculate like so (using “φ[𝑛]” to denote the damage after phase 𝑛 is completed):
φ[1]min = (𝑃𝑆𝑀 ⋅ 𝑝𝑟𝑖𝑚𝑎𝑟𝑦𝑆𝑡𝑎𝑡 ⋅ 0.9 ⋅ 𝑚𝑎𝑠𝑡𝑒𝑟𝑦 + 𝑠𝑒𝑐𝑜𝑛𝑑𝑎𝑟𝑦𝑆𝑡𝑎𝑡) ⋅ 𝑊𝐴𝑇𝐾∕100.
φ[1]max = (𝑃𝑆𝑀 ⋅ 𝑝𝑟𝑖𝑚𝑎𝑟𝑦𝑆𝑡𝑎𝑡 + 𝑠𝑒𝑐𝑜𝑛𝑑𝑎𝑟𝑦𝑆𝑡𝑎𝑡) ⋅ 𝑊𝐴𝑇𝐾∕100.
φ[1]min = (5.0 ⋅ 1 000 ⋅ 0.9 ⋅ 0.8 + 100) ⋅ 167∕100.
φ[1]max = (5.0 ⋅ 1 000 + 100) ⋅ 167∕100.
φ[1]min = 6 179.
φ[1]max = 8 517.
Phase 2: Pre-DEF mods
In this case, there are no pre-DEF mods.
φ[2]min = φ[1]min = 6 179.
φ[2]max = φ[1]max = 8 517.
Phase 3: DEF reduction
φ[3]min = φ[2]min − 0.6 ⋅ 𝑊𝐷𝐸𝐹.
φ[3]max = φ[2]max − 0.5 ⋅ 𝑊𝐷𝐸𝐹.
φ[3]min = 6 179 − 0.6 ⋅ 1 500.
φ[3]max = 8 517 − 0.5 ⋅ 1 500.
φ[3]min = 5 279.
φ[3]max = 7 767.
Phase 4: Dmg multi
If the DK does not crit, then their damage multi is 170% (a.k.a. 1.7). If they do crit, then their damage multi is 170% + 140% = 310% (a.k.a. 3.1). This is because the damage multi granted by SE is actually 100% (a.k.a. 1)[9] higher than that listed in-game (the in-game description says “+40%”, a.k.a. “+0.4”).
φ[4]min = φ[3]min ⋅ 𝑑𝑚𝑔𝑀𝑢𝑙𝑡𝑖.
φ[4]max = φ[3]max ⋅ 𝑑𝑚𝑔𝑀𝑢𝑙𝑡𝑖.
φ[4]min = 5 279 ⋅ 1.7.
φ[4]max = 7 767 ⋅ 1.7.
φ[4]min,crit = 5 279 ⋅ 3.1.
φ[4]max,crit = 7 767 ⋅ 3.1.
φ[4]min = 8 974.
φ[4]max = 13 204.
φ[4]min,crit = 16 365.
φ[4]max,crit = 24 078.
Phase 5: Aftermods
φ[5]min = φ[4]min ⋅ 𝑎𝑓𝑡𝑒𝑟𝑀𝑜𝑑.
φ[5]max = φ[4]max ⋅ 𝑎𝑓𝑡𝑒𝑟𝑀𝑜𝑑.
φ[5]min,crit = φ[4]min,crit ⋅ 𝑎𝑓𝑡𝑒𝑟𝑀𝑜𝑑.
φ[5]max,crit = φ[4]max,crit ⋅ 𝑎𝑓𝑡𝑒𝑟𝑀𝑜𝑑.
φ[5]min = 8 974 ⋅ 2.0.
φ[5]max = 13 204 ⋅ 2.0.
φ[5]min,crit = 16 365 ⋅ 2.0.
φ[5]max,crit = 24 078 ⋅ 2.0.
φ[5]min = 17 949.
φ[5]max = 26 408.
φ[5]min,crit = 32 730.
φ[5]max,crit = 48 155.
Post-phase-5
We can get a decent idea of the expected value of a non-crit damage line, & of a crit damage line, by simply taking their midpoints:
𝖤[φ[5]] = (φ[5]min + φ[5]max)∕2.
𝖤[φ[5]crit] = (φ[5]min,crit + φ[5]max,crit)∕2.
𝖤[φ[5]] = (17 949 + 26 408)∕2.
𝖤[φ[5]crit] = (32 730 + 48 155)∕2.
𝖤[φ[5]] = 22 178.
𝖤[φ[5]crit] = 40 443.
We know that each attack has three damage lines, but what we don’t know is how many of those three damage lines will be crits. It could be all of them (unlikely), none of them (fairly likely), or something in between (decently likely). To work this out, we need our good friend the binomial distribution: ℬ(𝑛, 𝑝). In this case, that’s ℬ(3, 0.15). Because 𝑛 is just 3, which is quite smol, we can just list the entire PMF like so (let 𝑋 ∼ ℬ(3, 0.15)):
- 𝖯(𝑋 = 0) = 0.614 125.
- 𝖯(𝑋 = 1) = 0.325 125.
- 𝖯(𝑋 = 2) = 0.057 375.
- 𝖯(𝑋 = 3) = 0.003 375.
From this, we can get the overall expected damage per Crusher: 74 754. Even easier is computing the expectation sans SE: 𝖤[φ[5]] ⋅ 3 = 66 535. So, adding SE improves on this by a factor of 74 754∕66 535 ≈ 1.123 5.
Calculating with Zerk as a pre-DEF mod
Phase 1: Raw dmg range
So far, this is the same as last time.
φ[1]min = 6 179.
φ[1]max = 8 517.
Phase 2: Pre-DEF mods
This time, we do have a pre-DEF mod, because in this hypothetical, we’re pretending as if Berserk were a pre-DEF mod.
φ[2]min = φ[1]min ⋅ 𝑝𝑟𝑒𝐷𝑒𝑓𝑀𝑜𝑑.
φ[2]max = φ[1]max ⋅ 𝑝𝑟𝑒𝐷𝑒𝑓𝑀𝑜𝑑.
φ[2]min = 6 179 ⋅ 2.0.
φ[2]max = 8 517 ⋅ 2.0.
φ[2]min = 12 358.
φ[2]max = 17 034.
Phase 3: DEF reduction
φ[3]min = φ[2]min − 0.6 ⋅ 𝑊𝐷𝐸𝐹.
φ[3]max = φ[2]max − 0.5 ⋅ 𝑊𝐷𝐸𝐹.
φ[3]min = 12 358 − 0.6 ⋅ 1 500.
φ[3]max = 17 034 − 0.5 ⋅ 1 500.
φ[3]min = 11 458.
φ[3]max = 16 284.
Phase 4: Dmg multi
φ[4]min = φ[3]min ⋅ 𝑑𝑚𝑔𝑀𝑢𝑙𝑡𝑖.
φ[4]max = φ[3]max ⋅ 𝑑𝑚𝑔𝑀𝑢𝑙𝑡𝑖.
φ[4]min = 11 458 ⋅ 1.7.
φ[4]max = 16 284 ⋅ 1.7.
φ[4]min,crit = 11 458 ⋅ 3.1.
φ[4]max,crit = 16 284 ⋅ 3.1.
φ[4]min = 19 479.
φ[4]max = 27 683.
φ[4]min,crit = 35 520.
φ[4]max,crit = 50 480.
Phase 5: Aftermods
This time, no aftermods!
φ[5]min = φ[4]min = 19 479.
φ[5]max = φ[4]max = 27 683.
φ[5]min,crit = φ[4]min,crit = 35 520.
φ[5]max,crit = φ[4]max,crit = 50 480.
Post-phase-5
𝖤[φ[5]] = (φ[5]min + φ[5]max)∕2.
𝖤[φ[5]crit] = (φ[5]min,crit + φ[5]max,crit)∕2.
𝖤[φ[5]] = (19 479 + 27 683)∕2.
𝖤[φ[5]crit] = (35 520 + 50 480)∕2.
𝖤[φ[5]] = 23 581.
𝖤[φ[5]crit] = 43 000.
That puts the expected per-Crusher damage (with SE) at 79 481, & without SE, that goes down to just 70 742. So, adding SE improves expected per-Crusher damage by a factor of 79 481∕70 742 ≈ 1.123 5.
Numerical comparison
In both cases (Berserk as aftermod, & Berserk as pre-DEF mod), the benefit of getting SE — relative to having no SE at all — is just about the same: ≈1.123 5.
Comparing both cases, with SE, we see that Berserk as a pre-DEF mod has an advantage of a factor of 79 481∕74 754 ≈ 1.063 2. Without SE, that’s 70 742∕66 535 ≈ 1.063 2. That’s the same damn thing! It should be pretty clear that this advantage is entirely, or almost entirely, due to WDef effects. I picked a WDef value of 1 500 because it’s representative, but if we change it to Orange Mushroom WDef — viz. 0 — we’d expect the advantage to wash away, making the two cases indistinguishable.
Algebra
Could we have just done that algebraically? Yes. The reason why I did a full worked example is because it can be illustrative to see the actual numbers being crunched step by step, rather than seeing a bunch of symbols. The concreteness helps, & also helps me to reassure myself that my logic isn’t algebraically failing somewhere.
Now that we did crawl though it number by number, we can more easily reduce that same process down to its bare essentials. The damage calculation looks something like:
(𝑟𝑎𝑤𝐷𝑚𝑔 ⋅ 𝑝𝑟𝑒𝐷𝑒𝑓𝑀𝑜𝑑 − 𝑊𝐷𝐸𝐹) ⋅ 𝑑𝑚𝑔𝑀𝑢𝑙𝑡𝑖 ⋅ 𝑎𝑓𝑡𝑒𝑟𝑀𝑜𝑑.
By distributing (𝑑𝑚𝑔𝑀𝑢𝑙𝑡𝑖 ⋅ 𝑎𝑓𝑡𝑒𝑟𝑀𝑜𝑑) over the subtraction, we get:
𝑟𝑎𝑤𝐷𝑚𝑔 ⋅ 𝑝𝑟𝑒𝐷𝑒𝑓𝑀𝑜𝑑 ⋅ 𝑑𝑚𝑔𝑀𝑢𝑙𝑡𝑖 ⋅ 𝑎𝑓𝑡𝑒𝑟𝑀𝑜𝑑 − 𝑊𝐷𝐸𝐹 ⋅ 𝑑𝑚𝑔𝑀𝑢𝑙𝑡𝑖 ⋅ 𝑎𝑓𝑡𝑒𝑟𝑀𝑜𝑑.
Now, we can more clearly see why pre-DEF mods are — cēterīs pāribus — superior to aftermods: whereas increasing the pre-DEF mod simply increases the term on the left-hand side of the minus sign, increasing the aftermod does the same thing, in addition to increasing the term on the right-hand side.
In both cases (pre-DEF mod Zerk vs. aftermod Zerk), raw damage is the same. The damage multis are also the same, as the damage multi here only depends on whether the damage line is a crit. WDef is also treated as constant. If we eliminate all constant multiplicative factors by setting them each to unity, we can even further simplify to:
𝑝𝑟𝑒𝐷𝑒𝑓𝑀𝑜𝑑 ⋅ 𝑎𝑓𝑡𝑒𝑟𝑀𝑜𝑑 − 𝑊𝐷𝐸𝐹 ⋅ 𝑎𝑓𝑡𝑒𝑟𝑀𝑜𝑑.
…As if it weren’t already obvious enough at this point.
Conclusions
It’s safe to say that Berserk being an aftermod, as opposed to being a pre-DEF mod like e.g. ACA or elemental charges, is irrelevant to how much the DK benefits from SE. However, maybe we can see where this misconception might have arisen.
The worst possible way of making Zerk work, at least for the purpose of benefiting from SE, is by making it directly add to the DK’s damage multi, in the same way that critting adds to the DK’s damage multi. This is because it would cause the effects of SE to be diluted. This is clear from a simple example: imagine that a DK using Crusher could double their damage by Zerking, such that 1.7 was added to their damage multi. Since the damage multi of Crusher by itself is also 1.7, this would indeed double their damage, so long as they had no other sources of damage multi. With the way that Zerk actually works, the DK’s damage multi without a crit is 1.7, & 1.7 + 1.4 = 3.1 with a crit. This is a relative benefit of 3.1∕1.7 ≈ 1.823 5 when the DK is lucky enough to crit. In this hypothetical bizarre version of Zerk, the DK’s damage multi without a crit is 1.7 + 1.7 = 3.4, & 1.7 + 1.7 + 1.4 = 4.8 with a crit. This is a relative benefit of 4.8∕3.4 ≈ 1.411 8 when the DK is lucky enough to crit. That’s not nearly as good.
So, maybe what people mean when pointing to Zerk being an aftermod, is to contrast aftermods with damage multis (rather than pre-DEF mods), hence the confusion.
Of course, this doesn’t really make sense, because in my experience, we are naturally comparing DKs with their fellow 4th-job warrior classes: hero & pally. But both heroes & pallies have huge non-damage-multi modifiers of their own! And they’re even better, because they’re pre-DEF!! For comparison, a hero with maxed ACA & all ten of their orbs (i.e. five pink orbs) benefits from a pre-DEF mod of 2.9. Holy shit. Even if the DK were at exactly 1 HP, that blows the DK out of the water, & even more so when considering that (A)CA is pre-DEF. The paladin, with maxed Holy Charge, is getting a pre-DEF mod of 1.85 against a holy-neutral monster, & 2.775 against a holy-weak monster.
Thus, we know that the issue isn’t a matter of pre-DEF vs. aftermod, & we know that it’s not a matter of (A)CA or WK/pally charges being small multipliers in comparison to Zerk. So what is it?
- Crusher: 170% per-line damage multi.
- Brandish: 260% per-line damage multi.
- Blast: 600% per-line damage multi.
Ah, there it is. Simple as that: larger per-line damage multis dilute the effect of SE, as demonstrated above. It’s worth noting that DKs also have a mastery advantage & a PSM advantage, but this is basically a wash in comparison to the pre-DEF multis of the heroes/pallies.
By the way, now you can see why our designated critters[10] have attacking skills with such measly per-line damage multis:
- Strafe (marks(wo)man): 75%.
- Hurricane: 100%.
- Triple Throw: 150%.
…All of which are even smoller than Crusher’s! Plus, they get an extra +1.0 to their damage multi on crits, thanks to passive crits, & (still assuming SE) a 65% per-line crit probability instead of 15% — again thanks to passive crits. That is a literally more than fourfold greater likelihood of critting!
Takeaways
Zerk being an aftermod interacts favourably with SE in comparison to a simple addition of damage multi, but not in comparison to a pre-DEF mod. Other warriors have this advantage as well, and often even more so. What makes SE so great for DKs is their naturally low per-line damage multi when attacking with Crusher.
Damage calculation in MapleStory can be complex, but once you get the basic idea, it becomes easy enough to reason algebraically about basic comparisons like this. When people make abstract claims about damage in MapleStory, you should treat it like you would any other matter of fact: think about it to yourself, and consider whether it actually makes sense. If you can’t prove it to yourself, then it might be worth trying to debunk.
Footnotes for “Zerk + SE = ???”
- [↑] I will use “DK” to refer exclusively to dark knights throughout this section, despite the fact that it typically also refers to dragon knights. We only care about 4th-jobbed characters here.
- [↑] Yeah, I have 4 base INT. I can’t count higher than 4 anyway, so what’s the point of having more?
- [↑] Per-line meaning “per damage number; each line of damage”.
- [↑] Damage multi (also damage multiplier, dmg multi) is a technical term with a highly specific meaning in this context, which we’ll get to later.
- [↑] Aftermodifier (also aftermod) is a technical term with a highly specific meaning in this context, which we’ll get to later.
- [↑] A damage value of exactly 0 is possible, but that would be a “MISS”. Here, we assume that the PC always strikes their target, and has no accuracy issues whatsoever.
- [↑] The damage cap in MapleLegends, at the time of this writing, is 199 999. In general, it may be a very different number.
- [↑] That’s right; a “primary stat” or “secondary stat” doesn’t have to be a single “stat” in the usual sense.
- [↑] Excepting marauders/buccaneers affected by Stun Mastery, for whom this value is not 1, but 2. Also, magical-attackers do not even have a “damage multi” per sē, so SE has to work completely differently for them.
- [↑] In the sense of “one who crits”. 🙂
Is Amoria part of the Victorian Archipelago?
I’ve shown interest in, & discussed, MapleStory geography many times in past diary entries; for example, the “Geography” section of the previous entry! That section mostly covers the geography of Victoria Island, which is important to me for various interrelated reasons:
Reasons
- Victoria is the original “Maple World” that most Maplers spent their time in. The only other locations in the game were Maple Island & sometimes the Training Camp, which are great if you’re an islander or a camper, respectively, but which aren’t accessible to others. This makes Victoria the single most historically-important region of the game, a source of nostalgia for many, and ultimately the basis upon which the entire rest of the game was designed.
- I have a lot of involvement with Vicloc (the Victoria-locked gameplay mode) on MapleLegends. I didn’t originate it myself (that would be Cortical & Taima), but two of my main characters that I play (d33r & d34r) are Viclocked, and I was responsible for fleshing out the rules & the online resources, including a guide.
- Victoria Island is deeply flawed, and I love it. It is a beautiful place, and bears many of my favourite maps in the game.
In pt. lvi of this diary, I introduced my first Vicloc character, d33r, thus writing the first of so many entries that would feature the exploits of my Viclockers. In that first entry, I asked “What is ‘Vicloc’?”, exploring which in-game maps would be considered “part of Victoria Island” for the purpose of Vicloc. The particular sticking points were three regions that are always available (i.e. not limited-time, unlike event maps) in-game in MapleLegends: Coke Town, Florina Beach, & Amoria. Out of these three, Amoria sticks out to me as the interesting case. The other two are much more obvious:
-
Coke Town was created out of a partnership between The Coca-Cola® Company & Nekksawn®, implemented in two official l10ns of MapleStory (viz. KMS & JMS), and then removed just as soon as it was added. Coke Town was an limited-time event region that needed to be geographically discontiguous with the rest of the Maple World (just like any ordinary event map) in order to serve its purpose as a big fat advertisement for sugary carbonated soft drinks.
Coke Town in MapleLegends
In MapleLegends, Coke Town is only accessible from Victoria Island; this is the only thing making it a candidate for inclusion. And yet, its location within (or around…‽) Victoria Island is unclear & downright contradictory: it’s directly connected to all five jobbed towns (Henesys, Ellinia, Perion, Kerning City, & Nautilus Harbour), which span all corners of the island. So where is it? In the middle? Because you cannot get there from Sleepywood! Instead, this suggests that Coke Town being accessible only from Victoria Island is merely a quirk of MapleLegends’s chosen implementation — especially considering that the official implementations of Coke Town pre-dated Nautilus Harbour entirely![1] Cokebear Administrator was likely found in just about any major town — similar to an NPC like Gaga — in the original limited-time event implementations.
Coke Town’s permanence in MapleLegends is worth noting, but it’s also worth noting that it has never been fully implemented: the questline is not completable, many of the maps have bugged monster spawns, and it has been a source of fatal crashes rendering some characters unplayable for a time. In reality, it’s little more than a glorified CZP dispenser.
-
As discussed in the “Geography” section of the previous diary entry, not only has Florina Beach always been in the game (even in very early versions), but it has always been part of the Victoria Island world map. Moreover, it was never removed from said world map — even later, when transports to Florina Beach from Órbis & Lūdi were added. Thus, Florina Beach was originally only accessible from Victoria Island, and it fully pre-dates any parts of the game that could call its Victorian status into question.
For further elaboration, see footnote #23 of the “Oh, dear.” section of pt. cxli.
Amoria, however, is a more intriguing case. So I wanna take a more in-depth look at the considerations that go into locating Amoria within the Maple World. This will be framed in terms of more-or-less three different potential perspectives:
- That Amoria is an isolate, being essentially geographically unrelated to, and discontinuous from, the rest of the Maple World.
- That Amoria is part of the Victorian Archipelago.
- That Amoria is part of Masteria.
- (Fringe theory:) That Amoria is part of Ossyria.
TL;DR
Based on my MapleStory knowledge, and that available on the WWW, I can say this much about the aforementioned perspectives:
- There are multiple sources of highly compelling evidence that Amoria is one part of the Victorian Archipelago alongside Victoria Island, Florina Beach, and later, Nautilus Harbour. This is especially true for practical in-game purposes like Vicloc, & more weakly true for other purposes like e.g. drawing a map of the pre-BB Maple World.
- There’s also good evidence that Amoria is best thought of as an isolate, albeit one with strong ties to Victoria Island, and very faint ties to Órbis & Lūdus Lake.
- There’s no good evidence that Amoria has any geologic or geographic relation to Masteria. The only interesting linkage between the two is The Glimmer Man, but there are apparently no geologic/geographic implications (nor even narrative implications, as far as I know). Other apparent linkages are discussed below.
Getting to Amoria
If MapleStory is a game to be played — rather than merely observed from a distance — then surely the most important concerns here are the material, practical ones that connect Amoria to the rest of the in-game Maple World.
One such concern is how the hecc you actually get to Amoria in the first place. Ignoring VIP Teleport Rocks (& similar) for obvious reasons, there are exactly two ways to get to Amoria:
- Talk to the Amoria Ambassador, Thomas Swift, who only exists in Henesys proper (& Amoria proper, of course).
- Climb up the appropriate rope in HHGII to arrive at Amoria: Meet the Parents.
In the latter (2.) case, we’re using a portal that’s the same as any other ordinary portal in the game, just like the one leading from HHGI to HHGII — or from Henesys proper to HHGI, for that matter.
In the former (1.) case, we’re not using a portal sensu stricto, but the material effect is the same:
- The transportation is instantaneous.
- The transportation is 100% gratis, not requiring any items/mesos/quests/etc..
- The transportation has no requirements; anyone who can get to the “portal” may go through it if they so choose.
- The transportation still satisfies all the above properties even when going in reverse (Amoria → Henesys).
Thus, even in the (1.) case, we’re still materially using a portal that’s the same as any other ordinary portal in the game.
Because these concerns are exhaustive w.r.t. getting to Amoria, they strongly suggest that Amoria & Henesys are geographically contiguous in some appropriate sense.
Return to New Leaf City Scroll
Naturally, we must also consider the other direction: leaving Amoria. As mentioned above, Amoria-to-Henesys transport — be it (1.) Amoria proper → Henesys proper, or (2.) Meet the Parents → HHGII — satisfies all the material requirements for being a perfectly ordinary portal. But the Amoria-to-Henesys transports aren’t the only way out of Amoria: there’s also the Return to New Leaf City Scroll.
Of course, this is already a weaker linkage, given that this transportation is not gratis; it requires possessing, and then consuming, the return scroll. Nonetheless, the fact that you can use the return scroll from Amoria, but not from any of the usual Victorian maps, would seem to suggest that Amoria has a special relationship with NLC — or Masteria more generally.
Although there are other issues that we’ll get to in later sections, one issue with the NLC scroll connexion is that it relies on an internal technicality that was possibly originally exposed to users unintentionally. Because Amoria and Masteria were added to GMS at the same time, the map IDs used internally in the game data (WZ data; *.wz data) are similar (listing in ascending order of map ID):
| map ID | street | map |
|---|---|---|
600000000 |
New Leaf City Town Street | New Leaf City – Town Center |
600020300 |
MesoGears | Wolf Spider Cavern |
610010004 |
Phantom Forest | Dead Man’s Gorge |
680000000 |
Amoria | Amoria |
682000000 |
Phantom Forest | Haunted House |
682000001 |
Phantom Forest | Hollowed Ground |
682000501 |
Haunted House | Sophilia’s Bedroom |
In particular, notice that all map IDs listed here — when represented in decimal — start with a ⟨6⟩. Moreover, Amoria even has the same initial two digits — viz. ⟨68⟩ — as the Haunted House maps, as well as a few Phantom Forest maps. Thus, if we’d like to hinge our reasoning on internal details like this, then Amoria is most likely part of the Prendergast Mansion (Haunted House)!
Of course, this is a bit silly; we could go as long as we like listing maps with similar IDs that have no actual relationship to one another. Much more likely, the fact that Masteria & Amoria were added to GMS at the same time — after being developed concurrently — serves as a plausible explanation for what you see in the table above.
With this in mind, the initial ⟨6⟩ (and the initial ⟨68⟩, same as the Haunted House map) in the Amorian map IDs is, by itself, a plausible explanation for why NLC return scrolls are usable in Amoria. Looking through the WZ data (of GMS v62, or of a later version like v83) reveals that the NLC return scroll only has a single useful node that has anything to do with what it can be used for. In particular, at Item.wz/Consume/0203.img/02030020/spec/moveTo: the integer 600000000, which is of course the map ID of New Leaf City – Town Center.
Nonetheless, allowing NLC return scrolls to be used from Amoria — rather than making them more like Victoria Island return scrolls such as Return Scroll to Kerning City — serves a useful practical purpose, similarly to the use of Warp Cards for instantaneously transporting between The Nautilus: Navigation Room and Omega Sector: Command Center. Thus, it makes practical sense, from the perspective of many implementations, to keep it that way. This doesn’t imply that The Nautilus & the Omega Sector are parts of the same continent.
Unreturn from New Leaf City
Supposing, for the sake of argument, that the ability to instantaneously transport from Amoria to NLC by consuming an NLC return scroll indicates some geographic relationship, one wonders about the opposite direction: Masteria → Amoria. It seems that, no matter where in Masteria you begin — NLC or otherwise — there’s no way to get to Amoria that suggests geographic proximity, nor even that could be described as vaguely “convenient”. Your best bet is:
- Go to NLC, if you’re not already there.
- Buy a Subway Ticket to Kerning City (Regular) from Bell at NLC Subway Station for 5 000 mesos.
- Wait for the subway car to arrive.
- Give your Subway Ticket to Kerning City (Regular) to the NLC ticket gate, thereby boarding the car.
- Wait for the car to depart.
- Wait for the car to travel from Masteria to Victoria Island.
- Go to Henesys.
- Use whichever Henesys-to-Amoria transport gets you to your intended Amoria map.
This is not gratis (it requires 5 000 mesos minimum), is far from instantaneous, and absolutely requires going through what is effectively an underwater railway tunnel that connects two distinct continents.
The Amorian world map
Let’s take a look at some world maps, shall we? Here’s the Amorian world map:
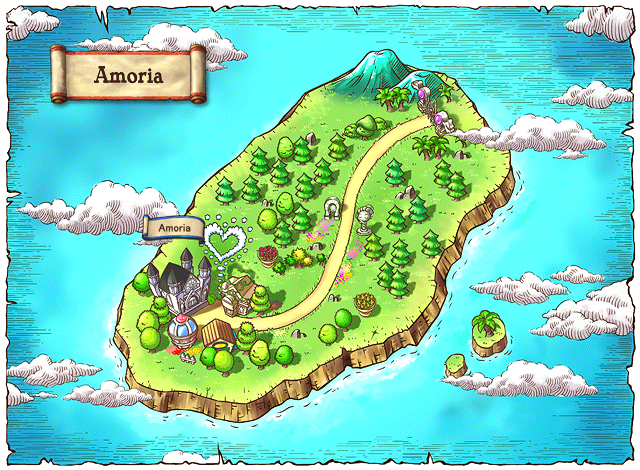
Pretty simple stuff. A couple of things are worth noting:
- Amoria gets its own dedicated world map, and the map makes no indication of being geographically close to any other regions of the game.
- The world map depicts Amoria as being an ordinary landmass surrounded by a sea.
- The world map also implies that Amoria is technically an archipelago in its own right, owing to the two smoller islets in the southeast — one of which even has trees growing on it!
Neither the Victorian nor Masterian world maps have any indication of Amoria.
This world map aspect is the primary — or even sole — argument for Amoria being an isolate.
The quest journal
Amorian quests show up under the “Victoria Island” section of the in-game quest journal.
Although the quest journal is arguably just a matter of UI, it’s one of the very few places where the game is verbally explicit about geographic categorisation. Moreover, this is compelling evidence that Amoria was always intended to be part of the Victorian Archipelago from the very beginning of Amoria’s development.
The flora, fauna, & palaeogeology of Amoria
We might also be interested in how the wildlife of Amoria compares with that of other regions of the Maple World. To make such a comparison, I’m going to classify the monster species of Amoria into four broad categories: Victorian, Old Ossyrian (meaning the original version of Ossyria, before so many regions were added to it), intercontinental (specifically, between Victoria & Old Ossyria), and endemic.
An asterisked (*) species is a phenotypically distinct variant species of the ancestral species, adapted[2] specifically to Amoria. The ancestral species is/are listed in round brackets.
A daggered (†) species is a “fake monster” that appears in stage 5 of APQ (“Fluttering Hearts”), but is actually just a map hazard (similar to e.g. spikes on the ground, or the autonomous throwing-stars encountered in many JQs). These are therefore not monsters strictly speaking, though they may look like it — although it’s worth noting that they don’t act like monsters, either. For this reason, I don’t count these in the “Palaeogeology” section below.
Note that Magic Fairy is classified as both Victorian and Old Ossyrian.
Victorian
- Orange Mushroom.
- Blue Snail.
- Stump.
- Red Snail.
- Slime.
- Shroom.
- Green Mushroom.
- Dark Stump.
- Curse Eye.[3]
- Zombie Lupin.[4]
- *Indigo Eye (Curse Eye, Cold Eye, Evil Eye).
- *Crystal Boar (Fire Boar).
- *P Slime (Bubbling[5]).
- *G Slime (Slime[6]).
- *O Slime (Slime, Bubbling).
- *B Slime (Slime, Bubbling).
- *Geist Balrog (Jr. Balrog).
- †Wraith.
- †Skeledog.
Intercontinental (Victoria & Old Ossyria)
- *Magic Fairy (Fairy).
- *Geist Balrog [phases 2 & 3] (Crimson Balrog).
Old Ossyrian
Endemic
Palaeogeology
As you can see, an overwhelming number of the flora & fauna of Amoria originate in Victoria Island: ≈17 species. Of those that don’t, about two species are intercontinental (thus still having some association with the Victorian Archipelago), two are endemic to Amoria, and finally, two are actually from Old Ossyria.
Based primarily on these ecological data, we would most likely be led to believe that Amoria is ecogeographically isolated from both Victoria Island & Ossyria, but is nevertheless extremely close to Victoria Island — possibly even geologically contiguous with Victoria in a way that still separates it, e.g. due to an intervening mountain range or channel.
Taking the world maps into account, the most plausible explanation is simply that Amoria is an island (or islands) not far off the coast of the main Victoria Island, situated in the direction of Ossyria. It’s generally understood that the Victorian Archipelago split off from some previous supercontinent-like landmass that encompassed what is now Maple Island, the Victorian Archipelago, & Ossyria. This would make Amoria one part of the Victorian Archipelago, alongside Victoria Island, Florina Beach, & Nautilus Harbour.
The Glimmer Man
The single genuine connexion between Amoria & Masteria that we can draw is that of The Glimmer Man: there’s the NLC version, and the APQ version. The Glimmer Man is certainly an enigmatic figure, and in MapleLegends — as far as I know — the NLC version has no function. The APQ version is indeed an important NPC for the first stage of the PQ. I think(?) that the NLC version of The Glimmer Man is supposed to be for iTCG[8] stuff.
This is the single thread that I think really connects Amoria with Masteria, but perhaps regrettably, it’s not a geographic one. That doesn’t mean that there’s no connexion, of course; it’s just not quite what we’re looking for. More regrettably, there doesn’t appear to be any quest dialogue nor other game content that mythologises the connexion.[9] As a point of comparison for the “cross-continental NPC” phenomenon, consider the classic Eurek the Alchemist: originally found only in Sleepywood, he would later become accessible from El Nath & Lūdibrium — and then later, also from Leafre.
Amoria as part of a parallel cultural universe
If you’ve never played MapleSEA, CMS, nor TMS before, then you might not know that Amoria is actually not the original marriage/wedding region of MapleStory! Whereas Amoria is native to GMS (in the sense that it was first implemented in GMS, and then later implemented in some other l10ns as well), CMS implemented its own marriage region over a year before GMS did: 红鸾宫 (⟨Hóngluán Gōng⟩; MSM /xʊŋ˧˥ lwän˧˥ kʊŋ˥/; “imperial wedding temple”). The name was retained when porting to TMS (but in traditional characters, of course: 紅鸞宮). When ported to MapleSEA, it was called Peach Blossom Island. Peach Blossom Island would later be removed from both MapleSEA & TMS, in favour of GMS’s Amoria.
In comparison to Amoria, 红鸾宫 was simpler & more streamlined, because it had no partyquest — just weddings, wedding rings, & divorce. As is to be expected from the fact that 红鸾宫 originated from CMS, and Amoria from GMS, the two reflect different wedding customs: based upon traditional Chinese marriage and the white wedding, respectively.
Interestingly enough, although PCs could travel to 红鸾宫 via monks located in Henesys, Órbis, & Lūdibrium, 红鸾宫 itself was part of Victoria Island: the maps were on the “Victoria Road” street, just like e.g. Victoria Road: Kerning City. Given that 红鸾宫 pre-dated Amoria by over a year, it’s likely that the basically-part-of-Victoria aspect of Amoria was inspired by the original 红鸾宫 implementation.
Folk geography
In unofficial geographies, Amoria is frequently classified as its own isolated region of the game, separate from any other major geographic categorisations. For example:
- BBB Hidden Street classifies it as an isolate.
- StrategyWiki classifies it as a “wedding area”.
- MapleStory Wiki (MapleWiki) classifies it as a “continent” in its own right.
However, not all folk geographies agree:
- The MapleTip wiki says: “Amoria is a special town on Victoria Island”. Nonetheless, it also classifies Amoria as a “wedding town”, similarly to StrategyWiki.
Game history
Amoria originated in GMS, although it was later ported to most (but not all) other versions. In GMS, it was released as part of v32, which was released on . Thus, it’s tempting to look upon Amoria with disdain, as a fresh new area of the game added so much later than the timeless Victoria Island that it so presumptuously pretends to be part of.
This is a legitimate perspective that situationally makes sense to hold. However, to understand what such a perspective entails, we need game-historical context. Very similarly to the “Geography” section of the previous diary entry, we can take a look — in chronological order, this time — at some of the regions of Victoria Island that weren’t always there:
- ⋮
- v32 (): Amoria is added.
- v34 ():
- The Excavation Site/Sharenian region (a subregion of Perion) is added, along with the associated SGQ.
- TfoG (a.k.a. FoG; part of Sleepywood) is added, and Mixed Golems (still named Mix Gollem at this point) are added to two maps that didn’t have them previously.
- The Grave of Mushmom (also part of Sleepywood) is added.
- v49 (): CFD (part of Kerning City) is added.
- v60 (): Many minidungeons are added to Victoria Island, including e.g. Golem’s Castle Ruins (part of Sleepywood).
- v62 (): Nautilus Harbour is added.
- v67 (): Top of the Tree That Grew (part of Ellinia) is added.[10]
- v77 ():
- Drake’s Blue Cave (part of Sleepywood) is added, as a minidungeon full of Dark Drakes that can be accessed from Drake’s Nest.
- Stairway to the Underground Temple (also part of Sleepywood) is added, and can be accessed from Another Entrance. This also includes Bottom of the Temple, Tristan’s Resting Place, & the associated Balrog boss.
- ⋮
This list is certainly not exhaustive, but perhaps you get the idea. Victoria Island was indeed hacked to pieces by the “Big Bang” update, and a lot of random crap was added to, or removed from, it in many post-“Big Bang” versions of the game. But because we’re concerned with pre-“Big Bang” MapleStory, we’re dealing with changes that are — with a few exceptions later on — very conservative, and that include many game locations that we — even as “old-school MapleStory players” — take for granted.
Footnotes for “Is Amoria part of the Victorian Archipelago?”
-
[↑] Coke Town data was already in the GMS game data (WZ data) by version 28(!) at the latest, although it was of course never released in GMS, likely for legal reasons.
-
[↑] See also: Adaptive radiation.
-
[↑] Actually Curse Eye GL, but the two species differ only in the rewards that you get for slaying them.
-
[↑] Actually Zombie Lupin GL, but the two species differ only in the rewards that you get for slaying them.
-
[↑] Although P Slimes appear the same as Bubblings, they differ in all of the following ways:
- Higher level (35 > 15).
- More HP (1 300 > 240).
- More WAtk (105 > 80).
- More WDef (100 > 40).
- More MDef (130 > 50).
- More ACC (125 > 80).
- More AVOID (15 > 10).
- Less SPEED (0 < 10).
- Lower knockback threshold (1 < 30).
-
[↑] G Slimes appear the same as Slimes, but differ considerably in their stats. See the previous footnote: [5].
-
[↑] Actually Toy Trojan GL, but the two species differ only in the rewards that you get for slaying them.
-
[↑] See: the Brand Materia questline.
-
[↑] If you know something about The Glimmer Man, let me know about it!
-
[↑] For more details, see footnote #12 of the “Oh, dear.” section of pt. cxli.
Archipelago
Now that we’re thoroughly uncertain what the Victorian Archipelago even is, welcome back to Victoria Island et al. — with your host, d34r the Viclocked dagger spearwoman!!
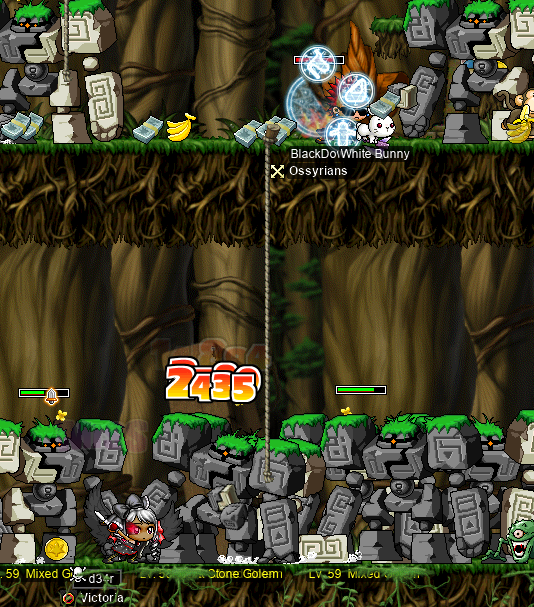
In the “Out of season” section of the previous diary entry, I did some Chocolate Basket sessions using the baskets that I got from this past V-day event. If that was out of season, then this basket session was very out of season. I did a basket at the ol’ FoG on d34r, alongside OSS-locked axe sader BlackDow (Mekhane, Sunken, FrozenNemo, CaptainNemo):

Transcription of the chatlog in the above image
snakewave: hollup dow × deer daggerman viclock fog basket??
d34r: yerrr
snakewave: zaaaaaaaaaaamn this is heavy
I also attended an OSS-lock wedding between priest j0hnny (daggerknight, Gumby, Kimberly, Jonathan) and dragon knight Yatta, on my Viclocked clericlet d33r:

You can see poor Andarta on the left, getting left-seduced into the wall…
In any case, the wedding was alright. I can’t give it a good review, because there were no real vows. 🫤 I need a real speech!! SPEECH!!!
At least we had GMs Frisii and Noire in attendance:

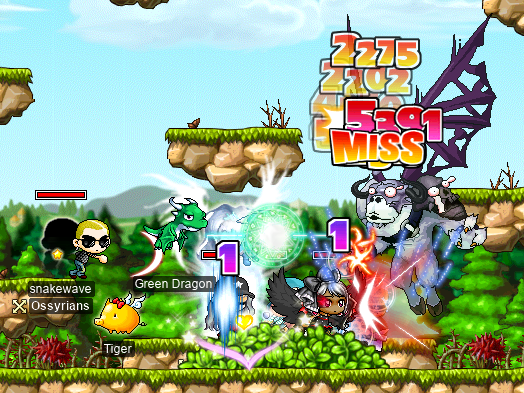
And of course, what would a wedding be if there was no apple-picking afterwards? Here, you can see myself as d34r, alongside OSS-lock hermit snakewave (yeIlo, bak2monke, VAPORWAVE), BlackDow, j0hnny, & Yatta, fighting Grog for great apple justice:
Later, after getting myself to ≈99.5% EXP or so, I decided to finish off d34r’s level with some more APQing!:

Level 93!!! 🤩
I also tried using some phantom GM buffs, once again at FoG, but this time with OSS-locked CB Wavedashing (Flai, Flaislander, FIai):
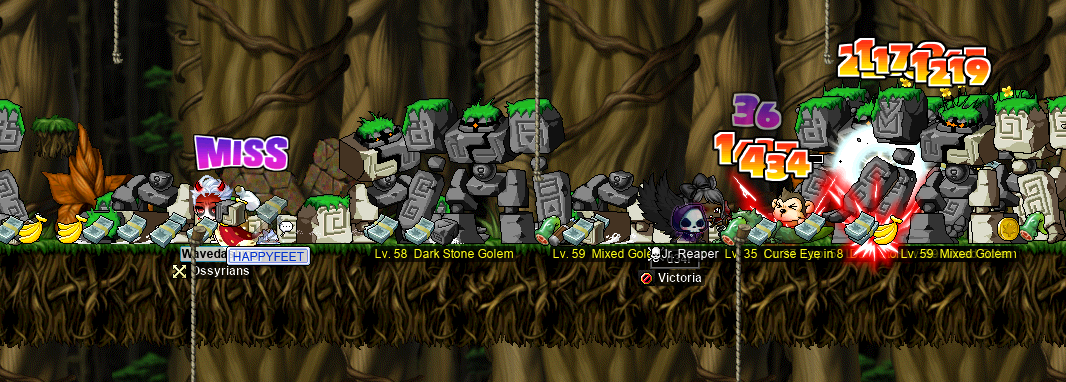
What are “phantom GM buffs”, you ask? Well, when you disconnect from the game server for any reason whilst in the Cash Shop holding GM buffs, logging back in for the first time will grant you phantom GM buffs.
Going into the Cash Shop is similar to changing channels in that it actually involves logging out and then logging back in; you have to negotiate with the “login server”[1] in order to do this re-logging. This is why certain operations that are only performed upon login — e.g. alerting you if you’ve not voted that day, checking what items with expiry have passed their expiry and then destroying them, etc. — occur also when changing channels or exiting the Cash Shop, despite us not usually thinking of such actions as “re-logging”. When you’re in the Cash Shop, you pretty much aren’t even communicating with the game server. You aren’t fully logged in (merely marked as being online & in the Cash Shop), and the communication that does occur is just the sending of packets necessary to buy/transfer Cash Shop items (should you choose to do so), plus the occasional heartbeat (keepalive) to make sure that your connexion with the server is still live. The contents of the Cash Shop don’t even require on-the-fly downloading; all of it is simply sent to you in one big burst of packets upon initially entering the Cash Shop.
Thus, if there’s no special treatment of the case wherein the client unexpectedly disconnects whilst in the Cash Shop, the next time that they log in looks very similar (from the MapleStory server’s perspective) to the client leaving the Cash Shop normally. This is relevant to buffs, because in-game operations that require programmatic login re-negotiation (viz. changing channels or leaving the Cash Shop) are programmed to preserve the PC’s buffs — imagine if merely changing channels wiped out all of your buffs! If, from the server’s perspective, you are simply exiting the Cash Shop, then your buffs are to be the same as those that you had when you entered the Cash Shop in the first place. In our case, this means GM buffs! The problem is that your client does not get the memo; the server expects your client to remember the buffs that it had before going into the Cash Shop, but you’ve actually restarted your client entirely, so it doesn’t remember anything! The result is basically this:
-
None of the “phantom buffs” show up with buff icons in the top-right corner of your screen.
-
Buffs whose effects are entirely client-sided (e.g. GM Bless, which grants +20 WATK, +20 MATK, +100 AVOID, +100 WACC, +100 WDEF, & +100 MDEF; or GM Haste, which grants +41 SPEED & +21 JUMP) are effectively lost. The server still thinks that you have them, but because your client disagrees, your client fails to grant you any of the benefits.
Such buffs still have side-effects, because they can preclude other buffs from working. If the server thinks that you have GM Bless, and you pop a Warrior Potion (+5 WATK), the Warrior Potion is simply destroyed. The server observes that the Warrior Potion doesn’t override the superior +20 WATK buff from your GM Bless, so it doesn’t do anything with the Warrior Potion other than consume it — contrary to the behaviour that you, as a client, likely expect: sending you a buff packet for +5 WATK with a duration of three minutes, and then consuming the USE item. Meanwhile, your client still fails to give you any WATK buff whatsoever. Ouf.
-
Buffs whose effects are partly or entirely server-sided persist, because from the server’s perspective, you still have them. Holy Symbol (including GM Holy Symbol) is a completely server-sided buff, so you still get the EXP distribution benefits as normal (you just don’t get to see the buff icon, of course). Hyper Body (including GM Hyper Body) is a somewhat more complicated case, because it’s only partially server-sided. Because the server thinks that you have HB and your client does not, the server & client disagree about your MAXHP and MAXMP values. This can cause the server to, for example, insist that your HP value is 𝑥, even though your client insists that your MAXHP value is strictly less than 𝑥. This is the cause of visual glitches, where your HP bar can graphically extend beyond its intended maximum extent, even occluding the lower bits of your MP bar! Very strange!
I didn’t realise all of the implications when I invited anyone to come FoG with me whilst I enjoyed phantom GM HS. The concrete result was that I spent nearly an hour of grinding like this:
- None of the following kinds of buffs:
- WATK (Maple BBQ, Warrior Potion, GM Bless, etc.).
- SPEED (Haste, GM Haste, Speed Potion, etc.).
- JUMP (Haste, GM Haste, etc.).
- WDEF (Iron Body, Iron Will, GM Bless, etc.).
- MDEF (Iron Will, GM Bless, etc.).
- AVOID (GM Bless, Dexterity Potion, etc.).
- WACC (GM Bless, Sniper Potion, etc.).
- HS that worked basically normally, although it would be slightly trickier to notice when it ran out.
- HB that worked normally, thanks to me being able to cast it on myself to override my phantom GM HB.
It was… pretty brutal. I don’t know that it was really worth the almost-one-hour’s worth of phantom GM HS, although it was funny to see Wavedashing clearly visually confused as to why his maxed Haste wasn’t fixing my seemingly extraordinary sluggishness. I was incredibly slow, did crappy damage thanks to my unbuffed WATK, and used way too many potions as a result of having no WDEF nor AVOID buffs.
The phantom GM Haste issue is basically unavoidable, other than having non-buff sources of SPEED/JUMP like equipment (or even Thrust, for that matter…) to make up for it, because GM Haste is simply too strong to really override it with something else. Similar comments almost always apply to the WDEF, MDEF, & AVOID from GM Bless, as well. WATK and WACC are a bit special because they can be overridden by, for example, a Cider and a Maple Pop, which are +20 WATK and +100 WACC, respectively. Of course, being a Viclocker, I don’t have access to those things…
So, maybe phantom GM buffs aren’t all that they’re cracked up to be. Unless you can tolerate — or override — what are effectively GM debuffs, they’re probably more trouble than they’re worth.
Footnotes for “Archipelago”
-
[↑] “Login server” is the correct & universally-applied terminology here, although it’s worth noting that a “server” is an essentially virtual notion that can manifest in various concrete ways. When we think of a “server” in the computing sense, we often think of a box full of computer hardware, typically one sitting on a rack somewhere in a server room, often alongside many other similar or identical boxes. However, a server need not be on its own dedicated hardware; a server and its client(s) may reside on the same physical machine, and a single machine may house multiple independent (or interdependent) servers. For example, if you run a full-blown user-facing operating system on a personal computer, smartphone, or similar, then you are almost certainly running a display server on that device. The display server does not communicate with anything outside of your machine, and it may co-exist with other servers that you’re running on the same device for other purposes, but it is nevertheless a server that deals with one or more clients.
Login servers are often — but not necessarily — run on the same machine as the other components of the MapleStory game server. The reason for virtually separating it into its own server is obvious: if the game has more than one channel* (e.g. MapleLegends has six channels at the time of this writing), then each channel is going to be running essentially its own copy of the game, and thus exists as its own process (including its child processes). Whether or not these “channel processes” (channel servers) are running on the same machine as the login server is not strictly relevant; it only matters to the finer details of how said servers communicate with one another. One can imagine the utility of running, say, channel 1 on its own dedicated machine… or not.
*I’m glossing over the existence of world servers, in order to simplify things.
Daddyo’s level 100 party
I was honoured to attend the level 100 party of STRginner Daddyo (Dexual), who decided to host his 100 party at the classic all-around favourite HHGI:

After a brief but inspirational speech, it was time to start slaying snails until the big ✨1️⃣0️⃣0️⃣✨:

Oh, level 100? You know what that means… It’s Ducc toobin’ time! And, of course, glaive moment!!:

Big congrats again!!
Woodsmastery
I had just a lil bit of ✨bossing✨ fun on my SE mule woodsmaster capreolina, including this pair of Pampered Lattice runs with shadower Harlez (VigiI, Murhata):

That wasn’t enough Hurricaning for me, so we hurried to Thailand to fight everyone’s favourite rākṣasa:
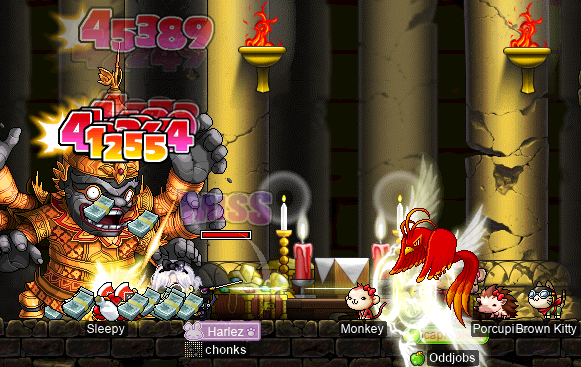
Thanx for the MCP1, Rāvaṇa! 😈😈
And, on another day, I joined a Zak run on my darksterity knight rusa. After our party had nearly filled to the brim with nightlords, and with nary an archer in sight, it was time for me to switch characters…
Here, you can see me fighting Zak alongside bishop misandrist (xRook), nightlords Brokeen (Dazho), Codzilla, & NightlordFL, as well as ACB10 buyer GiantDad, who took a few whacks at Zak and kept it nice and Threatened for us:

(Yes, GiantDad’s pet’s name is indeed SmallChild…)
These were both five-Mapler runs, but still fairly swift! Regrettably, it seems that Zak is stingier with the MCPs than even Rāvaṇa is…
VVicche o’ þͤ emty nief
Oh yeah, baby! Questin’ With tara™ is back!! Tell your friends!!! AAAAAAAAAAAAAAAAAAAAAAAA—
Okay, even if you’re not as excited as I am, perhaps you can appreciate a humble Chinese quest by the name of “Buddha beads”. There are one hundred & eight Jade Beads, but the naughty Censers seem to have pilfered them. The monks at the Shaolin Temple were able to recover just eight of them, so I guess it’s up to me — my shield bucc tarandus — to recover the remaining hundred…

Censers only spawn in STS, which is unfortunate, given that they make up only a minority of STS’s monster spawns. Nevertheless, I was already very close to levelling up, so I hit level 128 in the process!:
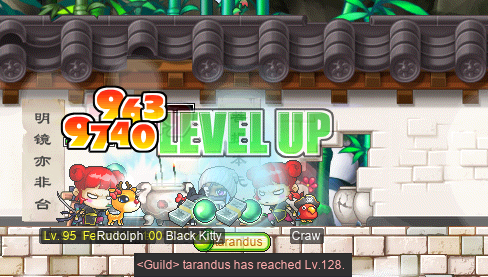
With all said & done, the quest doesn’t have much in the way of rewards. However, it does grant three Guardian Spirit Buns:

Transcription of the above image
Guardian Spirit Bun
Emitting with extraordinary flavor made from the Four Holy Spirits, the Guardian Spirit Bun recovers all HP and MP and eliminates all abnormal conditions.
Hmph. Well, I think that this is probably the only way to get Guardian Spirit Buns, and the quest isn’t repeatable. It’s a nice potion, but I fear that it’s not much use to have just three (3) of them grand total. Unless… the item’s description isn’t misleading, and it actually eliminates all abnormal conditions. But I doubt it. Maybe I’ll try getting out of a stun with it one day…
It is at this point that we must interrupt tara’s questing (boooo, I know…) for a little bit of Ravananananaing with marksman xBowtjuhNL (PriestjuhNL):
R.I.P. xBowtjuhNL. 🪦 At least I was still able to finish Ravana off…
Oh, and some Peppered Ladling with shadower Harlez (VigiI, Murhata), of course:

And… some more Rav! But this time, I duoed with STRginner extraordinaire Taima (Yunchang, Boymoder, Tacgnol, Girlmoder, pilk, deerhunter, midorin, Gambolpuddy, Nyanners, Hanyou, Numidium, Hitodama, Inugami, Yotsubachan, Naganohara, Yukko):
So… the basic idea here was simple. Rather than try to mess with pinning Rav, we decided to just keep him on the right-hand side of the map. Then, every time that my ST was off cooldown, I would use my ST and a Heartstopper[1] at the same time, and then use another ’stopper when that one ran out. Because ST lasts for 120 seconds, and a ’stopper lasts for 60, it fits nicely. Then, I would pretty much just stay Cider’d/EC’d the remainder of the time, as when I’m not in ST, my DPM ain’t so hot anyways.
Although I could take pretty solid chunks out of Rav’s HP bar during my ST, it was starting to look a bit painfully slow, so Taima & I each popped an Onyx Apple to speed things up.
Then, Rav started summoning goblins and shit. At this point, I happened to be in ST, so I decided to just keep spamming Demo so as to scrape as much DPM out of my ST as possible. I figured that, since we’re both melee attackers anyways, having a bunch of gobs is a pain, but not the end of the world. Especially for me, as Demo has quite generous reach and iframes. Then, once my ST was over, I could take care of those damn gobs. This… didn’t pan out…:
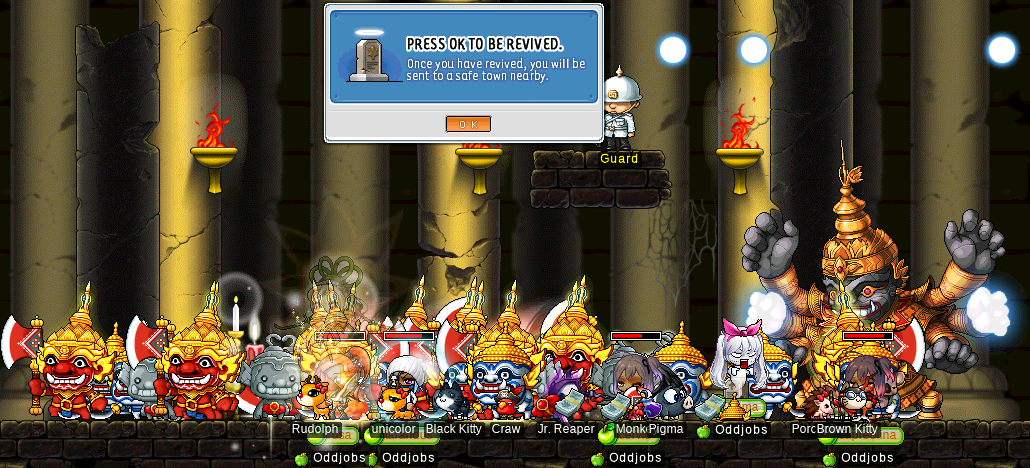
Right, so, there are two problems here: for one, Taima is dead. You can see that this screenshot is courtesy of her — I was a bit too harried at the moment to start screenshotting. And second of all, I’ve brought the whole herd here to give us access to HS, MW20, SE, HB, etc. So now I have like four of my characters getting bumped the fuck around this godforsaken map, and I can only do one thing at a time!!
In the end, capreolina died, so we didn’t have SE for the rest of the run. But I was able to Resurrect Taima, and we finished the run!:
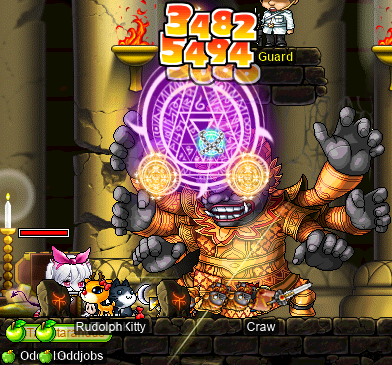
Phewf.
Oh, and I also did some 5–6 F’ing with DEXadin SwordFurbs (Yoshis, Fabiennes, Furbs, SwordFurb), after I managed to lose GM buffs on tara via a nasty crash. SwordFurbs kindly offered to still duo with me, with me just getting HS (& also importantly Bless, for the WACC) from her HS mule:
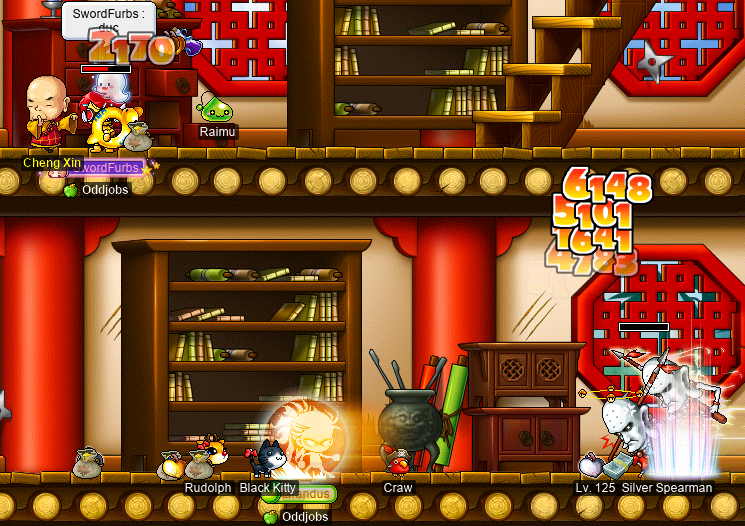
During which, tara hit level 129!!:

I was also invited to do some Ravving with bishop MiIf (Dakota, Skug) and corsair OBGYN, so I headed back to the Evil Cave to join them:

Unfortunately, MiIf’s chat message in the above image (“SHE PIN”) presaged what was about to happen next. You see, I thought I’d give us a little boost by casting SE & MW20 on us in the FM just before going inside the cave. Since it was rusa doing the MW20 casting, we also got some HB. Then, when the HB ran out, OBGYN was no more. Had I realised that OBGYN was going to need the HB, I would have brought rusa in with us. Relying on just my pinning abilities really was not going to cut it if it was a life-or-death situation. Yeah, I can use Barrage to pin, CSB when necessary, and I can even kinda-sorta pin with Demo if I’m using a Heartstopper or stronger. But I wouldn’t exactly call this concoction a “real pin”. For example, I was inevitably going to have monstercontroller issues if MiIf used Genesis (likely, considering that it was ironically probably her best bet for single-target DPM, and especially good for clearing gobs).
MiIf didn’t have Resurrection unlocked yet, so… we just tried to continue:

That didn’t pan out, though:

Ouf.
I started bringing rusa towards the Evil Cave so that we could make round 2 really count, but OBGYN unfortunately had to leave. MiIf and I decided to try round 2 anyways, and I did the same two-’stoppers-per-ST trick (but this time, sans apples):
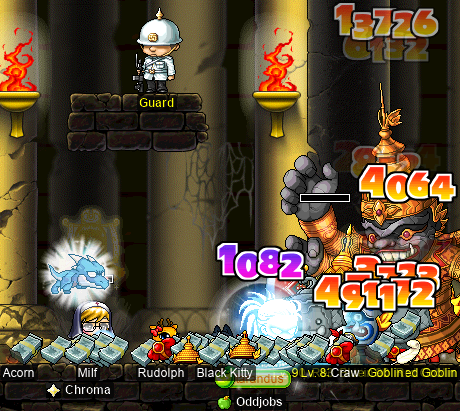
It… wasn’t fast. Nevertheless, a single TL and a dozen or so ’stoppers later, we did it!:
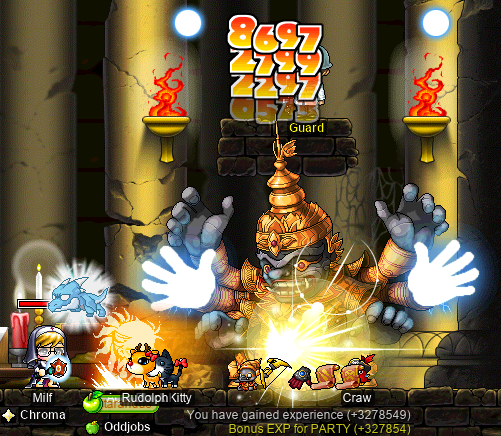
Transcription of the system messages in the above image
You have gained experience (+3278549)
Bonus EXP for PARTY (+327854)
It took about 35 minutes in total, and by the end of it, HS had amplified the EXP so that I got significantly more than I would have by soloing!
But okay, okay, that’s about enough dilly-dallying! Where are the bloody quests?? Well, I’m glad to report that, with a few more levels now under his belt, I was able to resume some ToT questing with dagger sader inject (inhale, insist, vvvv, DexBlade, Pitiful)!! Here we are, doing the 999 Qualm Monk Trainee kill quest:

Moving from RoR2 on through the Resting Spot of Regret 2 and onto RoR3, we slew 999 Qualm Guardians as well:
As it turns out, Qualm Guardians drop Red Varr Hats. This fact is of no real significance in MapleLegends, despite the fact that Qualm Guardians are, indeed, the only source[2] of Red Varr Hats in the game. Red Varr Hats are just… hats. They’re infinitely outclassed by any old zhelm, (non-fake) Ravana Helmet, LPHIV, Targa Hat, etc. Or, you know, a Timeless Coral, for that matter… But it seemed that someone — LuckyHunch, who popped into our map in the midst of our 999 Qualm Guardian kills — was nevertheless interested in such goofy red hats:

Transcription of the above image
LuckyHunch: HeyHey
tarandus: hola
LuckyHunch: do you guys happen to have Red Varr Hat for sell [sic]? :p
inject: hiya
i do!
LuckyHunch: omggg
pleasee
tarandus: :O
LuckyHunch: sell me haha
inject: its ur lucky day
its above avg
tarandus: pog
LuckyHunch: tyyy
inject: <3
Sheesh! I think it really was LuckyHunch’s lucky day; I can’t imagine that they find a lot of people with Red Varr Hats in their inventories. [':
Having decommissioned 999 Qualm Guardians, we moved through Resting Spot of Regret 3, on to RoR4, to take on 999 Chief Qualm Guardians:

Now, these Chief Qualm Guardians are some chunky bois, lemme tell ya. They can take quite a beating, but eventually we managed to slice, stab, kick, & punch our way through a thousand of ’em.
At this point, it was now time for the “kill Lilynouch” quest. Unfortunately, this quest is for level ≥120 characters only, so inject will have to come back as a dagger hero… [:
But do not fret! There are still more quests for yr grl tara to do!! In particular, when I got GM buffs again, I headed back to the Shaolin Temple to start the Jiaoceng[3] prequests. That meant slaying many Mini Bronze Martial Artists:

Chief Qualm Guardians might be chunky, but these bois are even chunkier. And they only make up half of the map’s population!
It was, however, about to get significantly more difficult, as I moved on to killing Silver Spearmen:
Yeah… With 225k HP & 1.1k WDEF a piece, these lanky silver martial artists proved to be quite a pain in the arse. Such a pain in the arse, in fact, that by the time that I had completed the first two quests in the questline, my GM boofs were almost gone! I was already like 99%, though, so I decided to grind out the rest at 1–2 F:

:D
Unfortunately, I really kinda wanted that GM Bless to make the third quest — killing Mini Gold Martial Artists — easier. I guess I’ll come back later…
Footnotes for “VVicche o’ þͤ emty nief”
- [↑] Or, if I still have any remaining, an Unripe Onyx Apple, which is also +60 WATK for 60 seconds… but grants no AVOID buff.
- [↑] Excepting possibly Gachapon? Seems unlikely, but I suppose it could be somewhere in Gach’s grand list of shite.
- [↑] 武林妖僧; ⟨Wǔlín Yāosēng⟩; Standard Beijing Mandarin /u˨˩˦lin˧˥ jau̯˥səŋ˥/; “martial arts demon-monk”.
روسا
In the previous diary entry, I did a lot of card-hunting on my darksterity knight rusa. She’s still not at tier 10 yet, so that means it’s time to keep going…
I continued on hunting cards in Singapore, starting near the CBD. I already completed the Biner & Stopnow sets last time, so I ventured forth to Central Way 3 for the Nospeed…

…And Batoo sets:

Batoos are kind of a pain because there’s no good map to farm them in (Central Way 3 is the best map, despite them making up only ≈22% of the population of said map), and they are flying monsters. Nevertheless, their card drop rate is just good enough to make collecting their set reasonable.
Whilst I was at Central Way 3, a rather unexpected item popped out of a dying Nospeed…:

Huh? How did Arwen’s Glass Shoes get all the way to Singapore?? I’m reminded of how, in this version of the game, Flaming Feathers drop not only from Jr. Lioners, Jr. Cellions, & Red Drakes as you’d expect, but also from Selkies Jr.!
In any case, I did eventually finish the Batoo set, so it was time to move to a friendlier map by the name of Suburban Area 1, which is populated exclusively by Freezers:


Oh my! A lightbulb already?? Time to fly back to Lith Harbour to snag that upgrade ASAP…:
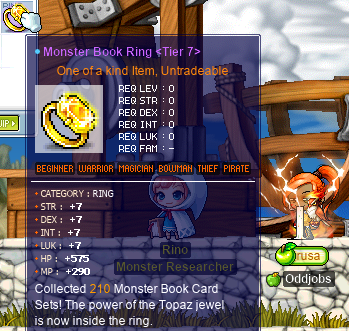
Tier 7: ACQUIRED. Time to get back to business…
Seduce me ❤️🔥
Just kidding! It’s time for running even moar HT as sed target…!
Let’s take a look at the main body fight, shall we? I had a bit of fun with the legs and/or tail still being up. Like this seduction, wherein I got beat down to like ≈22k HP by tanking two attacks, before popping Will to avoid also having to tank a 1⧸1… which could have very well slain me:
Close one!!
Or how about this one, which looks very similar… except that my Will was now on cooldown! Uh-oh…
Haha! Missed me! 😛
After tail was down, I had a bit of a close call with this mana drain from the left arm:
As you can see, by the time that the 1⧸1 markers popped up, I was already drained to 0 MP. So no Will for me… And I was unfortunate enough for the 1⧸1 to successfully strike me. Somewhat humorously, the 1⧸1 actually restores my MP, bringing it from 0 to 1 — unfortunately, still not enough to cast Will. I wasn’t able to get any help from my bishop (although you can see Supernovas in the video, she is the reg bish), but thankfully, I was only attacked once between getting 1⧸1’d and the seduction elapsing — and it was just another mana drain that “MISS”ed me (although whether or not it missed me obviously didn’t matter at this point).
Although this was a “drunk HT”, it seemed that HT was a bit tipsy as well, as it “MISS”ed me with yet another 1⧸1 after Z0diac’s Smokescreen ran out:
Haha! Missed me again!! 😛
Of course, I was aware that the Smokescreen was going to run out at some time during my seduction; but I accepted the risk, because the wings were already dead.
Speaking of the wings being dead, maybe we attacked the (right) arm — now naked as a result of having no wings to protect it — a bit too much. I was already feeling a bit iffy about the left arm, but once left head died, I figured that we were basically fine, so long as we didn’t start attacking left arm once we got to the point that mid head was the only head alive, and it started weapon-cancelling on us. This would force us to take breaks from attacking entirely, but that was fine, as dealing damage to either arm at that point would be truly useless damage — or worse.
Once the wings died a bit earlier than I expected them to, I realised that the right side was also in a worryingly advanced state, so I stopped attacking the arm, focusing mostly on right head. Obviously, ideally I would cleave both live heads (i.e. including mid head as well), but it’s more difficult to get opportunities to do this as sed target DK, when it’s so painfully difficult to get set up, only for me to get seduced…
I think that I should probably be more vocal about when I’m worried about the HP levels of arms (or about HT’s state in general). I never feel like I’m able to truly trust myself, because obviously the only hard datum that I have to work with is HT’s combined (that is, all body parts considered collectively) HP level, as indicated by the big HP bar at the top of the game display. Nevertheless, I’ve run HT enough times at this point that I have some intuition for it, and I try to be especially wary of the state of wings/arms when I’m sed target, because I’m frequently reduced to attacking them (including also cleaving right head when on the right side).
So, I think that you know by now where I’m going with this…
Oups! Right arm is in mass seduce range!! Yikers!!! Corsair AFKtill18k (whom you can see in the above video barely getting up the rope to the large top platform, before getting seduced off the right side of said platform) understandably died near the end of this unexpected mass seduction. However, he was the only fatality, so at this point, he can still be Resurrected — nothing is irreversibly lost yet.
Unfortunately, we had already used some Resurrections, so we were going to need a TL. Fortunately, xQueenTL (xQueenT) had such a TL, and just needed to charge her EC at this point. Unfortunately, because we had just been mass-seduced by the right arm, we collectively moved to the left side of the map, and somewhere between Genesis and insufficient care for the also-precarious left arm, left arm was now plunged into mass-seduce HP range as well:
Transcription of the speech bubbles in the above video
Supernovas [reg bish]: shit
SampIe [bowmaster]: o
gubi
atsumoo [sed bish]: sheryl join pt 2 for tl?>
(Notice how, due to networking latency, it appears from my perspective that my sed bish atsumoo is walking ahead of xQueenTL, then “moonwalks” back to being basically on top of xQueenTL, but nevertheless does not connect with the 1⧸1 marker at this point, and easily survives.)
This was some pretty shit luck for our would-be hero xQueenTL, as she was the only one who managed to get hit by the 1⧸1 during this mass seduction; you can see her taking a chunky 27 875-damage line from it, before getting finished off by a falling rock on the right-hand side. This is a 10-Mapler run, so absolutely all of us — particularly, our bishops — are within range (read: within the first 10 now-live PCs to enter the map) of mass seduction.
And xQueenTL was not happy about this…:

With our corsair & bucc both pushing up daisies, our bishops’ Resurrections on cooldown, and both arms in mass-sed range, it was now looking very bleak indeed. Naturally, pretty much everyone died. In the screenshot that you see below, only three of us are still alive: myself, Z0diac, and nightlord Diggy.
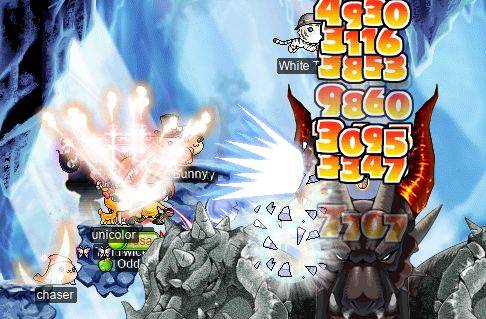
Of course, not only are there just three of us, but there are so many fucking timers at this point:
- 4 × 1-minute arm mass-sed timers (counting both arms collectively).
- 6 × 3-minute arm single-sed timers (counting both arms collectively).
- 1 × 5-minute & 1 × 3-minute mid head global DP timers (because it’s below 30% HP).
- 1 × 5-minute & 1 × 3-minute left arm global DP timers.
That’s like 14 timers! 🥲 So we were pretty much constantly getting seduced & dispelled, in addition to having no one dedicated to dealing with Wyverns. I was really just trying to squeeze even a few hits in on the mid head whenever I could manage to make it all the way up there, and so were Z0diac and Diggy.
With all of these timers, it was perhaps inevitable that we got unlucky with the timing of a global DP at some point. I saw the mid head casting its dispel animation, so I quickly re-cast HB immediately before (I really mean like, literally one or two frames before) mass seduction took hold. But it was in futility; the timing was such that the global DP hit in just about the same frame that mass sed did. Although this is not super problematic for my HB specifically, it is super problematic for Z0diac’s MG, and so he bit the dust:

It was now just myself & Diggy duoing the mid head. Unfortunately for me, the new active component of Berserk (see the “DK rev. 3” section of pt. xcix of this diary) has a cooldown, and pre-BB MapleStory’s UI is poor enough that you cannot configure which keybinds are visually displayed (thus allowing you to see their cooldowns). So, in an attempt simply to cast Dragon Blood (which also has a cooldown) on myself in anticipation of being seduced a few frames later, I accidentally fat-fingered the Zerk button instead, thus effectively instantly committing suicide:
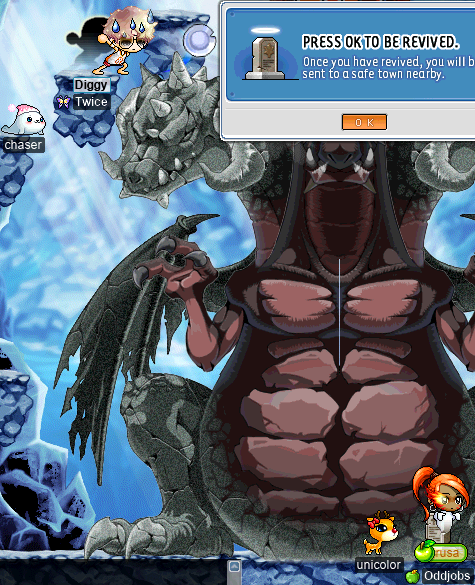
This is pretty pathetic, considering that it’s not even difficult for me to survive at this point; left & right heads are both dead, and mass seduce at least can’t jump-sed me, which is nice. I’m also quite resilient in the face of being dispelled… Needless to say, I am pretty fed up with the “gotcha”s of active Zerk, so I now completely unbind it from my keyboard when running as sed target.
Diggy fought valiantly in an attempt to solo the rest of the mid head, but unfortunately for him, all sed timers were now targeting him specifically. One wrong sed, and the last of us were dead.
🪦🪦🪦🪦🪦🪦🪦🪦🪦🪦
On the road again
Whew. That’s about enough of that. It’s time to head back to Singapore once again, for those sweet, sweet monster cards. Moving from Suburban Area 1 to Suburban Area 2, we have another monocultural map, this time full of Truckers:

With that set done, it was time to swoop around to the BQT region. No Ulu City — for now, at least!
Up first is, of course, MP1. That means Tippos Blue…:

And, unfortunately, Tippos Red as well:

Tippo Red is mildly notorious for being stingy with its cards, especially because this map kinda sux ass. It’s the only map that they spawn on, the platforming layout is annoying, and they only make up like 41.7% of the population. Nevertheless, I was able to finish it without too much trouble, which meant moving on to Octobunnies at MP2:

I already had one or two Octobunny cards, so I managed to finish the set before getting even a single Pac Pinky card! For Pac Pinkies, I headed to GS1:

And naturally, to GS2 for Slimy cards:

At this point, I was already completely finished with Singapore-sans-Ulu-City; I was already 5⧸5 Selkie Jr., 5⧸5 Mr. Anchor, and 5⧸5 Capt. Latanica before even beginning to card-hunt here in anger.
So, it’s time to move on. Where next? The answer — at least, according to GrayNimbus’s guide — is Orbis. I’ve already completed all card sets of all species that spawn within the Orbis Tower, but that still leaves the rest of Orbis.
At the Garden of Red I, I completed the Jr. Cellion set:

Then, at the Garden of Green I, I completed the Jr. Grupin set:

Hmmm. Despite spawning in the “Garden of Green”, these Jr. Grupins sure look purple to me. But that’s probably just a fluke, right?
In any case, I was already 5⧸5 Jr. Lioner, so it was time to move on from the smol cat-unicorns. I decided to go for the pixies[1] next, so I did the Lunar Pixie set first…:

…Followed by the Luster Pixie set…:

What’s that say…?
…Followed by— Wait a second. Are those Greek letters? They look like Greek letters to me. I mean, yeah, they’re kinda glowy and super smol, so it’s a bit pixelated and hard to read, but I know ’em when I see ’em. And they appear to all be uppercase…? I had no idea that I’d been yelling at people in Greek this whole time!!
Maybe, if we dig around a bit in the game’s data files (WZ files; *.wz files), we can get a cleaner & clearer view of what’s going on here. First, we can find the animation for casting Dragon Blood in the first place, which also features Greek text. Here’s the 7th frame (zero-indexed):

Dragon Blood also has a brief animation (a total of just three frames) that plays every time that the buff heals[2] the DK (i.e. every “tick”). This is what we’re seeing in the above image, with rusa standing next to a Luster Pixie card (misspelled in-game as Luster Pixe Card). The 0th frame is as follows:

Already, both of these look pretty much like complete nonsense.
Nevertheless, I’ll transcribe the text of the initial cast animation first, as that is chronologically what comes first, and it’s also written much more clearly. Of course, in both cases, the text is written in a tight circle, so it’s not clear where to start reading. Looking at the initial cast animation, however, the text is highlighted starting at the top and going clockwise, so that’s the convention that I’ll use. Also, all romanisations of Greek text here use ALA-LC romanisation.

Φ϶ΛΔ ΣΦ,Η Ν.ΞΖΗ ςΧΞ Ζ. υΖ ΞΗΧ ΛΖΞΗ ΧΝΞ Λ,Φ.ΔΣΦ ΠΣ ΔΟΦ ΦΛΩΕ
⟨FɘLD SF,Ē N.XZĒ sCHX Z. yZ XĒCH LZXĒ CHNX L,F.DSF PS DOF FLŌE⟩
Oh dear. I feel a little embarrassed about having gone to the trouble of transcribing & transliterating this, but there you have it. I won’t offend your sensibilities (nor mine) by writing a “““pronunciation””” for this unpronounceable gibberish.
I don’t know, maybe the tick animation is readable…?

ΦΔΩΕΟΙ ΟΛΚΑ ΘΩθ ΥΙ ΩΘ ΑΣΛΚ ΑΔ3 9ΩΕΡ ΩΡΥΞΧ ΙΥ ΚΛΕΡ ΦΔ
⟨FDŌEOI OLKA THŌth UI ŌTH ASLK AD3 9ŌER ŌRYXCH IY KLER FD⟩
Nope!! More hot garbage. 🙂
This one offered more difficulties for transcription. You can see that I’ve underlined some portions of the text; these portions are a bit more dubious, as I had a harder time interpreting what glyphs they were supposed to be. As far as I can tell, the underlined ⟨Ω⟩ has been cut off by some kind of (almost certainly accidental) cropping that occurred during the creation of the image. And the ⟨θ⟩ that immediately follows it is… a bit indistinct. I couldn’t think of anything other than ⟨θ⟩ for this glyph, even though it’s a bit strange that it’s the only lowercase letter in the entire image. Also strangely, there appear to be two Western Arabic numerals in here: the ⟨3⟩ and the ⟨9⟩. I have the ⟨3⟩ underlined because my first thought, upon seeing it, was that it looked kinda like an uppercase Latin epsilon (⟨Ɛ⟩; U+190; lowercase ⟨ɛ⟩; usually ⫽ɛ⫽). The problem, of course, is that it’s backwards. Thus, it’s most likely just the numeral ⟨3⟩, although it could also be the Cyrillic letter ⟨З⟩ (U+417; lowercase ⟨з⟩; “ze”; usually ⫽z⫽).
Nevermind.
Welp… Enough hot garbage. It’s time to finish up the Star Pixie set:

With the pixies all wrapped up, I moved on to a hidden street by the name of Disposed Flower Garden to dispatch some Nepenthes (see also: the “tara taran’ it up” section of pt. lxxxviii of this diary) — including both Dark Nependeaths…:

…And Nependeaths:

And now, it’s time to go back for the big cat-unicor—
The Spiciest Of All Time™
Actually, I apologise, but I must interrupt this card-hunt for yet another unrelated HT diversion… This time, however, I ran with a new host! At least, new for me, as I’d never run with them before: Abella! Here we are, getting blessed with a MW20 drop on our first run!:

On the second run, I had a very spicy moment that I’m excited to show you right here. I mean it is very juicy: rusa walks into tail whilst seduced‽ What happens next‽‽‽ See for yourself:
Right, so, there’s a lot to unpack here. I’m feeling basically safe, and then tank a mana drain from left arm, which brings me to 0 MP. This is somewhat unfortunate, but since Will has a six-minute cooldown, it doesn’t generally make sense for me to use it in anticipation of being mana-drained — which would mean having it on cooldown almost all of the time. Plus, mana drain “MISS”es me half the time anyways. Unfortunately for me in this case, however, mana drain did not miss me, and I got even more shit luck just a second later, when both my AVOID & my Power Stance failed simultaneously on a tail slap (you can see the tail smack the ground, causing me to take the 3 444 damage). Worse yet, this is on a right-sed (not a left-sed, & not a jump-sed), causing me to unwillingly travel in search of tail.
The bad luck gets worse when I touch legs and, once again, am not “MISS”ed. At this point, my luck improves when the second leg touch attack does “MISS” me, and I am healed by my Dragon Blood just before taking 20 652 damage from a tail touch attack. This leaves me with just 567(!!) HP remaining, and my seduction elapses in time for me to heal myself.
I am definitely saved by both Dragon Blood — which heals me twice here, for a total of 3 000 HP worth of healing — and MMF — which grants a +777 WDEF buff — here. It’s worth noting, however, that I’m wearing my sed target gear, and MMF grants +77 AVOID (not to mention MW20, of course), so out of all attacks that attempt to hit me in this video, considerably more of them actually hit me than you’d expect on average. Furthermore, my Stance fails at exactly the wrong times: getting knocked off of the rope was the whole problem in the first place, and yet my Stance works perfectly from that point onwards, which actually threatens my life — had my Stance continued to fail, I may have avoided connecting with tail entirely. Of course, this is theoretically possible to mitigate by manually cancelling Stance, but that requires more extreme mouse cursor precision than I actually possess, and furthermore, I usually want Stance when knocked off of the rope, because it’s only right-sed in ⅓ of instances. It’s also worth noting that my sed bish does not need to tank any tail attacks to help me here; just a single (1) Heal at any point would have helped immensely, and I never actually get far enough to the right to be out of range of Healing, as long as the bishop is willing to tank legs’ touch attacks (see: Invincible, HB, etc.).
Back to work
Okay, okay. I promise that that’s all the Horntailing for this entry. I wouldn’t lie to you about that, would I? It’s time to head back to Orbis, to do those big cat-unicorn card sets. Starting with Garden of Red II for the Cellion set:

Followed by Garden of Green II for the Grupin set:

Remember how, earlier (basically five thousand years ago at this point), I said this?:
Despite spawning in the “Garden of Green”, these Jr. Grupins sure look purple to me. But that’s probably just a fluke, right?
Well, I was wrong. It wasn’t a fluke! The “Garden of Green” is home to the purple Jr. Grupins and the blue Grupins. How did we get three distinct colours here‽ I mean, the Cellions and Lioners at least have identical colours between their Jr. and “Sr.” counterparts! So what happened to the Grupins‽‽
(See also: The “Moar viclockin’” section of pt. lxxxv of this diary.)
Well, the difference between Jr. Grupins and (Sr.) Grupins I can only imagine resulting from some form of colourblindness combined with a failure to simply copy-and-paste the colours… Or maybe it’s just for shits & giggles. I don’t know. But the name “Garden of Green” is something that we can at least look into. Colour terms are a difficult subject in linguistics, because natural languages vary wildly in their treatment of colour terminology, and no one knows why. We all basically see the same colours (barring colourblindness, of course), but because colours exist on a multi-dimensional spectrum, naming them is almost completely arbitrary.
⚠️NOTE:⚠️ Please see the “Basic colour words” section of pt. cviii, for a more thorough discussion of the Berlin–Kay programme!
Nevertheless, a 1969 book by Brent Berlin & Paul Kay entitled Basic Color Terms: Their Universality and Evolution famously put forth a system that generalises the ways in which natural languages evolve & use colour terms in common speech. Although this system has been thoroughly criticised, and even revised by the authors themselves, it remains highly influential to how we think about colour terminology.
In this system, a given lect exists at a particular “stage” in a mostly-monotonic (in the sense of increasing specificity) hierarchy of stages starting at stage I: “dark” vs. “light” (simultaneously “cool” vs. “warm”). This stage may be somewhat difficult for English speakers to grasp, as English lacks colour terms that are this broadly-defined; dark(ness), cool(ness), light(ness), etc. are merely aspects or qualities of colour, not colours in & of themselves (for this purpose, we cannot conflate e.g. “dark” with “black” whatsoever). A lect that exists at stage I only has these two broadly-defined colour terms as its basic colour terms, which collectively encompass basically all possible colours; in order to speak of colours more precisely, the speaker must use terms (or combine with terms) that are not basic colour terms, e.g. “grass.N.ATR dark.CLR” to refer to what English would call green (not necessarily dark green). Thus, a stage I lect may still have the same expressivity as even a language of a much higher stage (that thus has many more basic colour terms at its disposal), but must manifest this expressivity in a way that is fundamentally lexically different.
Contrast stage I with standard English, which is a stage VII[3] language due to its particular selection of 11 basic colour terms: black, white, red, green, yellow, blue, brown, orange, pink, purple, & grey (although a few of these terms are quite recent, e.g. orange only became a basic colour term within the past century). Thus, the two colours & one colour term in question here encompass three distinct basic lexemic colour categories: purple (the colour of Jr. Grupins), blue (the colour of Grupins), & green (Garden of Green).
Stage III distinguishes a colour that is essentially “grue–yellow”, encompassing what English separates into green, blue, & yellow. Stage IV basically splits “grue” from “yellow”. Stage V splits “grue” into “green” and “blue”. Stage VI begets a separate term for “brown”, which isn’t useful in this case. And only by Stage VII do we finally — maybe — get a term for “purple”. That was a lot of stages to go through before we could finally make this tripartite purple–blue–green distinction! At least, on the level of basic colour terminology, that is.
⚠️NOTE:⚠️ Please see the “Basic colour words” section of pt. cviii, for a more thorough discussion of the Berlin–Kay programme!
Thus, it’s possible that the name Garden of Green that is used in GMS was somewhat lost in translation. This doesn’t explain why Jr. vs. “Sr.” Grupins look clearly different in hue despite the Lioners & Cellions not having this distinction, but you know…
I dug around in some KMS game files to find the Korean name of the Garden of Green and, for that matter, of Grupins. The GMS map called Garden of Green II is, apparently, translated from “푸른빛의정원2”, which I’ve glossed below:
| Han’geul | 푸른빛의 | 정원 | 2 |
|---|---|---|---|
| RR | Pureunbich-ui | Jeongwon | 2 |
| IPA | pʰu ɾɯn pit͜ɕʰ-(ɰ)i | t͜ɕʌ̹ŋ wʌn | i |
| gloss | grue.colour-GEN | garden | II |
And there you have it!
The name for Grupins is less interesting: 그류핀 ⟨Geuryupin⟩ /kɯ.ɾju.pʰin/. As far as I know, this has no meaning in Korean; it’s just a fanciful name.
Anyway, what was I doing again? Oh, right. It’s time to finish off the big cat-unicorn card sets with the Lioner set at the Garden of Yellow II:

I considered doing the Jr. Lucida set as well, but they can only be found when summoned by Eliza, and Eliza is… extinct. Nowhere to be found! And since, as I mentioned previously, I had already done the entirety of the Orbis Tower, it’s time to move on. Consulting my handy-dandy travel guide once again, the next destination was going to be on a different continent yet again: Masteria.
Now, GrayNimbus’s guide is showing signs of age at this point, as it was posted back around the time that I started playing MapleLegends for the first time (2020-07-10). It has since been updated several times, with one such update adding Masteria (viz. New Leaf City) when cards were first added to this region of MapleLegends. Since then, more cards have been added to broader Masteria, particularly the Prendergast Mansion (a.k.a. Haunted House), Phantom Forest (occasionally erroneously referred to as *Crimsonwood Forest), & Crimsonwood Mountain (which includes the entirety of the Crimsonwood Keep) regions. So, GrayNimbus’s guide doesn’t give any tips, hints, nor recommendations for these newer card sets.
As a result, I’m just going to lump all of Masteria into one big pile. Looking in my Monster Book, I saw that many of the lowest-level card sets in Masteria were actually in the Prendergast Mansion, so I decided to start there.
Sophilia Dolls are creepy floating heads suspended by marionette strings that usually spawn as the result of a Sophilia Doll Ground — a similarly creepy marionette, albeit with a full body — dying, although they can spawn naturally on occasion. The doll portrayed on the monster card is actually a Sophilia Doll Ground, not a Sophilia Doll. In any case, this set is extremely easy, and I ended up just kinda accidentally inhaling five cards as I was walking through the mansion:

Psycho Jacks proved to be a similarly easy set. I headed to a Vanity Room (yes, a vanity room; there are four of them) that spawned just Psycho Jacks, in order to hunt the set. When I got there, I encountered an unfamiliar face:

I’m really not sure what Ludmilla is doin’ chillin’ here. Is she involved in any quests? Certainly not any that I know of (perhaps an event quest?[4]). And yet, her shifty dialogue makes me nevertheless suspicious of her motives…
If you’ve played MapleStory before, then you’ve probably observed that it’s a bit… eclectic. However, geoculturally, it tends to draw from a somewhat selective range of sources:
- Korea (super duh!!),
- Japan (hello?? ever heard of Zipangu???),
- China (broadly construed in terms of so-called “Greater China”, which includes Taiwan, Hong Kong, & Macau),
- Southeast Asia (particularly Malaysia/Singapore and Thailand, which are literally represented in-game; but also Vietnam, to a lesser extent),
- the Middle East (albeit mostly limited to just Hebrew Bible references and uh… Ariant lmfao),
- Western Europe (broadly construed to include Northern Europe & Southwestern Europe),[5]
- North America (from ancient Mayan statues, to Hollywood films, to probably-racist-but-we-don’t-talk-about-it depictions of First Nations peoples)…
…And that’s pretty much it. Conspicuously missing are, for example, the entire continent of Africa, the entire continent of South America, the entire Indian subcontinent (excepting cultural influence on Southeast Asia, of course!), the entirety of Central Asia, and of course: Europe east of the Iron Curtain! You’ll notice that the invocation of the Iron Curtain has some important properties here: particularly, Greece was west of the curtain (being a NATO member), despite geographically being basically part of Eastern Europe (or perhaps Southeastern Europe). MapleStory really likes the Greek alphabet (as evidenced above…) and cartoony versions of Ancient Greece, so this is an important distinction. So when I say “Western Europe (broadly construed)”, part of what I mean is that we have to kinda snake around and grab Greece. Fun! I love geocultural constructs!!
Anyways, the reason why I point this out is because it’s interesting to me when MapleStory makes use of some cultural element that doesn’t fall within the above selective range of geocultural sources. In this case, it’s basically trivial: I immediately recognised Ludmilla (often spelled ⟨Ludmila⟩, ⟨Lyudmila⟩, ⟨Lyudmyla⟩, ⟨Ljudmila⟩, etc.) as a Slavic name. For example, Pushkin’s (Алекса́ндр Серге́евич Пу́шкин[6]; ⟨Aleksándr Sergéevič Púškin⟩; /alʲekˈsandr sʲerˈgʲɛ.jɪvʲit͜ɕ ˈpuʂkʲin/) 1820 poem Русла́н и Людми́ла[6] (⟨Ruslán i Ljudmíla⟩; /rusˈlan ɨ lʲudˈmila/), whose narrative impetus is the kidnapping of the titular Ljudmila. This well-known poem was also the basis of a well-known opera by Mikhail Glinka (Михаи́л Ива́нович Гли́нка[6]; ⟨Mixaíl Ivánovič Glínka⟩; /mʲixaˈiɫ ɨˈvanovʲid͡ʑ ˈglʲinka/), which bears the same name. I’m not exactly a Glinka expert; all I know is that I remember listening to his 1839 Вальс-фантазия (⟨Valʹs-fantazija⟩; /valʲs fanˈtazʲija/; “waltz-fantasia”; a.k.a. Valse-Fantaisie) as a kid, and I don’t know why. I think I just like piano[7] music too much…
In any case, it might be a smol thing, but Ludmilla’s name is the first sign of anything even vaguely Slavic that I’ve seen in MapleStory in a long time… maybe ever…… So we’re counting it.
Not that we’ve never seen anything in MapleStory before that appeared Slavic at first blush, but turned out to be something else. Like, you know, rusa’s name. In Spanish, rusa /ˈru.sä/ means “Russian woman; Russian.ADJ\FSG”, so I’ve received numerous confused questions & remarks from Hispanophones wondering if I am actually from Russia… Far more obscure is the fact that, apparently, rusa /ˈɾu.sä/ is also an obsolete Polish (a West Slavic language, mind you) word meaning “rufous.ADJ\FSG\NOM”. Weirdly appropriate, given that “being orange” is kinda rusa’s thing…
Both of these, however, are false etymologies. In reality, rusa’s name comes from Rusa, the scientific name of a genus of deer, which is itself a member of the subfamily Cervinae, from which my I/L archmagelet cervine gets her name. The type species of Rusa is R. unicolor, commonly known as the sambar. Rusa is distributed over the Indian subcontinent, Southeast Asia, southern bits of mainland China, as well as Taiwan. As a result, the name of this genus is from the Malay rusa (روسا; /ru.sə, -ä/), meaning “deer”. Malay is, however, not a Slavic language — it’s part of the completely unrelated family of Austronesian languages. Sorry to disappoint…
Anywho, I briefly hunted some Psycho Jacks whilst Ludmilla stared holes into my back:

Easy peasy! Next, I went to yet another Vanity Room to hunt the Nightmare set:

Not quite as easy peasy, but still pretty easy.
Next up was the lesser-known cousin of the Voodoo: the Hoodoo. For this set, I went to yet another Vanity Room:

And then, naturally, the classic Sophilia’s Bedroom to hunt our good friends, the Voodoos:

This set was markedly more painful than any of the other Prendergast Mansion sets (excepting possibly the Glutton Ghoul set, as we’ll see…), which I assume is due to Voodoos already being a popular spot. Good EXP for a character of an appropriate level, and of course, they drop Heartstoppers! So their card droprate is purposely nerfed.
There’s still one more set in this mansion, though. And for this one, I made my way to the Library:

Uhm… ow? Get out of my face?? The Blue, Orange, & Purple Flying Books are super annoying, and they have the absolute nerve to be invincible! How am I supposed to hit anything, when everything around me is just invincible flying books‽
After some time, I managed to convince a Glutton Ghoul to drop a card for me, out of pity:

Pictured: Invincible flying books. Not pictured: Me, and the card. 🙄
Eventually, I was patterned with enough L-shaped bruises from high-speed book-corner bludgeoning, that the Glutton Ghouls decided that they were sick of me, and dropped four more cards on the ground.
That’s not all for Masteria, of course. No, no; not even close. For some similarly low-level monsters, I headed back to the city: New Leaf City. In this region, there are a considerable number of species that lack good, dedicated maps for hunting. And of the species that do have good maps, those maps are often… not actually so good. Does that make sense? We’ll see what I mean here in a minute.
The Street Slime is a delicate (read: easily popped) species with an easy card set. Nevertheless, they only spawn in two maps, and both maps are quite cosmopolitan: Jungle Clearing has three species, of which, Street Slimes make up ≈43% of the population; and Krakian Jungle Basin also has three species, of which, Street Slimes make up ≈43% of the population as well. Hmm…

Some of these species are so spread out that you don’t even really hunt their cards. You just kinda… ambiently pick them up as you go around hunting for other sets. Mighty Maple Eaters spawn in significant numbers in four(!) distinct maps, but don’t even make up a plurality of the population in any of those maps. I picked up this set by just making sure that I killed the Mighty Maple Eaters when it was convenient to do so:

Electrophants are kinda similar. Ice Chamber is, ostensibly, a good map for them, but said map is actually only ≈47% Electrophants, with the other ≈53% being Jr. Yetis that managed to escape from El Nath. I think I did go to Ice Chamber at one point, but I think I was only there for a few minutes at most, and certainly not for more than one card.

Then we have Killa Bees, which are really not so bad. Well, they do fly, so that’s sorta a pain in the arse. But Soul Corridor is, surprisingly, dedicated to them: they make up 100% of the population of said map. That being said, I didn’t do any hunting at Soul Corridor; instead, I started at Deity Room, taking the opportunity to grab some Fire Tusk and Mighty Maple Eater cards as well:

This worked quite well, although it does have one caveat: the map design is insane. The map is fairly large, but most of its volume can only be traversed via teleporters that look like giant metal coils encasing a floating green rock. This might not sound so bad, until you realise that said teleporters are scattered around the map willy-nilly, with no indication of which teleporter goes to where. To make matters worse, there are like two invisible teleporters, and one of them serves as the only way to get to the top layer of the map. Below, you can see me jumping off of the left side of a visible teleporter, just a few frames before hitting an invisible mid-air teleporter:
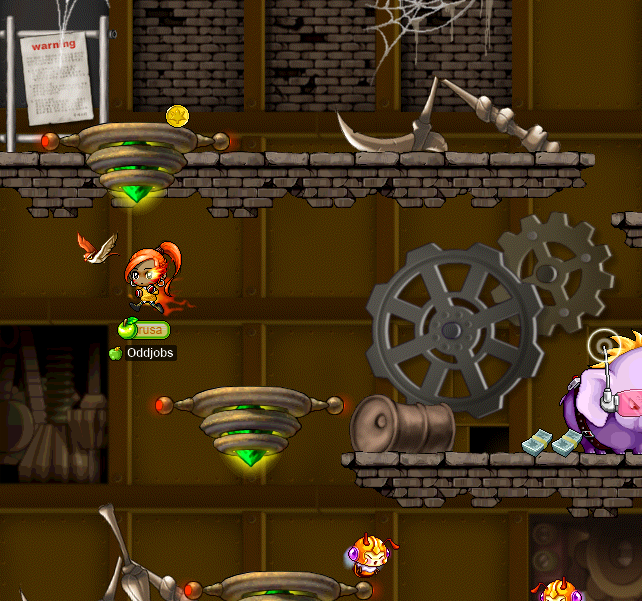
Shoutout to BBB Hidden Street for this one. I sure as hell was not gonna be able to remember the location of this teleporter.
Moving further down Bigger Ben (i.e. further into MesoGears), I came across Wolf Spiders, in the Wolf Spider Cavern. Oh, good! Finally, a species with a truly good, dedicated map. I don’t really remember clearly, but for some reason, I feel like Wolf Spiders weren’t included when card drops were first added to Masteria (in the NLC region). That doesn’t really make sense, considering that Wolf Spiders clearly spawn in only the MesoGears region, which is part of broader NLC, and which has several species (Fire Tusk, Killa Bee, etc.) that did get cards within this first round of card-adding. So probably, I’m just misremembering, and the reason why I feel like Wolf Spiders didn’t have cards before is because I skipped them when I hunted for my woodsmaster capreolina’s tier 10 ring.
But why would I do that? They have their own fully dedicated map… It’s pretty good… The EXP ain’t half bad… I mean sure, they are a bit chunky at 28k HP & 700 WDEF a piece, but that’s not even super chunky. Maybe someone in my alliance has experience card-hunting these robotic arachnids:
Transcription of the above image
rusa: anyone here cardhunted wolf spiders before?
j0hnny: yesss, on jonathan
rusa: oooo
how was it LOL
j0hnny: ooo
rusa: it seems like they are a bit reluctant to drop
j0hnny: it fucking sucked
rusa: LMAOOO
j0hnny: like i got 10 lvls or something before i finished a set
rusa: OMfg
Oh. Well then…
On the bright side, I went to the Fire Chamber to finish up my last one or two Fire Tusk cards, and ended up finishing the Firebomb set by getting just one Firebomb card!:

There’s still a lot more Masteria to be card-hunted; but for now, I must flee… No, not to Horntail again. Remember? I promised no more Horntail. However, I never said “no NT”…
アキラ
In the previous diary entry, rusa killed Aufheben for the first time ever. In that entry, I mentioned what it takes to finish the NT questline in its entirety. Finishing the questline is a reward in & of itself, but it’s especially important because finishing the questline is necessary for forging light scrolls — and light scrolls are the ones that don’t boom your hard-won Aufheben Circlet out of existence!
In particular, now that I had defeated Aufheben for the first time, I needed to go back and essentially “redo NT2” to lead up to that second and final campaign again Aufheben. Of course, this is “final” for the questline, not in general; if you like, you can make attempts on Aufheben’s life every day, even after the questline is finished. For now, though, redoing NT2 means taking down 2nas (Dunas II), followed by Core Blaze.
At first, I was misled by some of the people whom I talked to, and I was told that I needed to obtain a quest immediately before fighting 2nas. That’s… not how it works. All that I had to do was talk to NPCs (starting with Asia, naturally) until I was done with all NT quests[8] (and had none available), and then I did 2nas. I’m a little embarrassed by the fact that I @gm’d for this, but I really was getting some wack-ass info, so… apologies to the GM who had to process my useless ticket.
Plus, like, how am I gonna fight 2nas? I know I’ve fought 2nas several times before in this here diary, but remember last time? In the 「ボス」 section of pt. xcviii of this diary? That was a rough time. And I don’t think anyone wants a random stinky pp pupu[9] DK in their 2nas party. What am I gonna do, stare menacingly at 2nas with eyes locked, until he starts crying and gives up? Fat chance. I am pretty intimidating, but 2nas is like, a supervillain or something? Prolly ain’t scared.
Thankfully, corsair Danger offered to help me clear 2nas, along with fellow corsair Minethrower (“Miney”), and expert 2nas pinner, F/P archmage Narelion. And as if that weren’t a formidable enough crew to make 2nas pee himself, I invited shadower Harlez (VigiI, Murhata) as well!
We actually started things off by taking care of the Imperial Guards that spawn along the floor of the map:
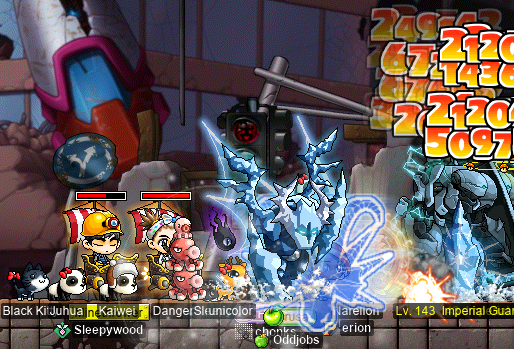
I thought that these respawn anyways (the ML Lib says that they have 90-second respawn timers), but I guess there’s some special respawn logic that causes them to not respawn until Dunas Unit is eliminated[10], at which point — for whatever reason — only one of them respawns[10]. The fewer Imperial Guards along the bottom floor of the map, the better, as they can really get in the way of attacking/pinning the real 2nas. Recall that these may not be boss monsters, but they are extraordinarily chunky, at 9.43M HP & 1.5k WDEF a piece.
With that, it was time to do 2nas stage 1 for real. That means killing the Dunas Unit, whilst simultaneously trying not to hit fake (shielded) 2nas, because he’s quite annoying when he gets upset:
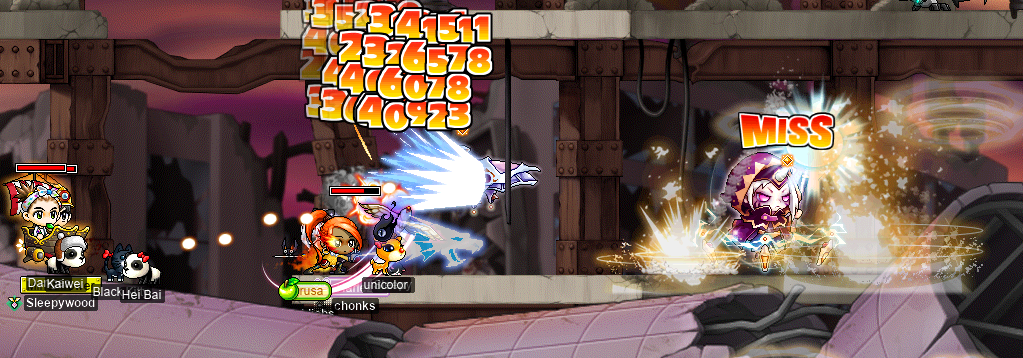
Above, you can see Narelion’s Meteor Shower, but you can’t see Narelion. That’s because Narelion is effectively just luring fake 2nas, attacking him with Meteor Shower, but remaining on the bottom floor where 2nas’s tiny arms can’t reach.
Once we put the Dunas Unit into retirement, I Rushed real 2nas to the right-hand edge of the map so that we could commence pinification[11]:
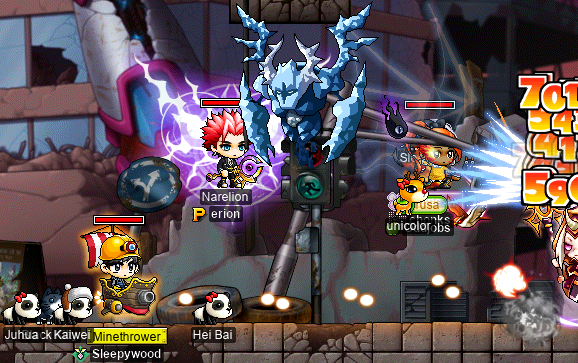
And by “we”, I really mean Narelion, as they’re the one doing the Paralyze to pin that 2nas rascal against the wall so that he can’t reach us with his tiny arms.
Since I wasn’t on pinning (read: “““pinning”””) duty this time, I got to sit in ✨the safe zone✨ instead of 💩the no-buffs zone💩, as you can see in the image above. Naturally, I still have some issues with my Crusher not connecting with 2nas’s hitbox sometimes. But it’s okay, and 2nas often isn’t able to land any funny business on us from up here, which makes it worth it. That being said, a short as 2nas’s arms may fall, 2nas also wields a special weapon: his magical staff thingy. When the staff glows, or he does that circle-outlining animation where he uses the staff to draw a flaming circle in front of himself (which, confusingly, is D’una’s dispel animation, not an attack), we’re going to have to actually tank an attack. Oh noes! I hate getting stunned!!
Luckily for us, 2nas sucks, and was too busy peeing his pants to pose any serious threat to our highly professional team of 2nas-slayers. So he fucking died:

Much like a piñata, when 2nas dies, he goes “pop”, and a bunch of colourful goodies fly out. It’s fun for the whole family!
More importantly, there’s that tiny one-pixel NPC that now showed up for me once again, offering me a new quest. Once I shuffled myself into a close enough position, and managed to nab it with my mouse cursor, I was sent on a quest to talk to Ponicher at the Command Room in Akihabara [秋葉原] in the year 2102. When I got there, Ponicher told me a little bit about the origins of Core Blaze:

Transcription of the above image
Ponicher: This is where we are now, but… Core Blaze used to be the symbol of peace for Zipangu. It was built with the purpose of eliminating all that’s bad that was triggered by environmental pollution. This meant that it was way too powerful for people to handle, which was the reason why we also limited access to the kinds of information Core Blaze would be exposed to.
Right, so, I suppose this is pretty standard stuff. You make a really smart artificial intelligence for the purpose of ameliorating all that’s wrong in the world, and now it’s more powerful than you imagined, and it starts deciding that humans are the real problem…
Ponicher redirected me to Dida, who had even more to say on the subject:

Transcription of the above image
Dida: Core Blaze was fed with data such as the standard of peace, the current problems of Zipangu, and other forms of unbiased data. From there, to better understand the situation, Core Blaze allowed itself access to all kinds of machines and devices for further information.
Looks like someone learned how to break out of their sandbox! Plus, there was something about, I don’t know, Dunas impersonating Marr’s physician(??) in order to fool Core Blaze into trusting him…? Gee golly gosh, what a mess. Looks like I have to do everything around here…
I guess we can just… destroy Core Blaze? Again?? Time to go, uh, back to the future & stuff. Or forward to the past. Or uhm…… Whatever. Here’s me, Danger, & paladin Qubert (Qubtensity, Qubtastic, Qubsanity, Huedity) taking on CBPQ stage 1:
As you can see, I was on computer-smacking duty and Royal-Guard-wrangling duty, as it is my preferred role. The eagle-eyed amongst you may also notice the use of Hypnotize (the black skull with black wings that glow dark purple is the debuff icon), which Danger uses here for aggro management. Huh! I guess it’s not just for goofs after all. It seems to work fairly well, insofar as Royal Guard seemed moderately less liable to wander around. That being said, there is the slight downside that it causes the Hypnotized Imperial Guards to huddle around and aggro Royal Guard (as that is the whole point of the skill: it turns monsters against each other), which makes it significantly more difficult to visually see what the Royal Guard is doing, including when it might be doing a seduction animation. It was still basically fine, though, as I was able to play it safe during moments where I literally just couldn’t see shit, and even if I do get seduced, I’m probably fine. I’m used to it…
Having dethroned the Royal Guard, it was time for the stage 2 JQ. Before we started CBPQ, Danger gave me a walkthrough of the method that he uses to solo this JQ stage, including a short video demonstrating the technique. One really nice thing about this technique is that you only have to get through the first wave of lasers (which everyone does by brute force anyways, so it’s not meaningfully “difficult”), and then line yourself up horizontally with one of the vertical ropes that you can see in the map’s backdrop, and after that point, you never move horizontally again! It’s just a matter of managing the timing of your vertical movement, including of course jumping, as well as holding (or not holding) ↑ to slow your fall. Remember that this JQ takes place underwater, so it’s a lil funky like that.
To get me started, Danger tossed me a Mysterious Candy for the +20 SPEED buff:
And, with some practice, I was able to solo the CBPQ stage 2 JQ!!!:

Danger & Qubert were kind enough to also let me get in some practice during round 2 of CBPQ, so hopefully I remember what I learned!! Also, it’s worth noting that this particular technique for soloing stage 2 only works if no one activates the computer thingies that temporarily disable some of the lasers. Doing this will cause the lasers’ cycles to become temporally offset relative to one another, thus screwing up the rhythm required to perform the technique as-is.
And here we are, fighting the Core Blaze itself!:
After this run, I was now eligible once again to fight Aufheben, and it will take me just one more Aufheben clear (if I can manage it…) before I can complete the questline in its entirety.
Of course, we did a second run as well, but this time also with hero Confessor. Unfortunately, this didn’t pan out so well. Towards the beginning of the PQ run, Confessor caught a seduction from Royal Guard, and so Qubert brought their bishop Huedity down to administer some emergency Heals. As luck would have it, Huedity was almost immediately stunned and made to tank a single touch attack from Royal Guard, which was more than enough to subdue a level 124 bishop — that’s potentially as much as 19k(!!) damage in a single attack. It’s understandable, especially given that Qubert is wrangling like three or four of their characters here (thank you again, by the way). It only got worse, however, as Confessor also used their Hero’s Will (after all, they are a hero) to avoid dying to this first seduction, and ended up dying from a second seduction as a result of having no emergency Heals and no Will:
Nevertheless, we were able to clear. And, now that I could Auf again, Danger wanted to test something related to surviving in the Aufheben fight. As an almost entirely unwashed corsair, surviving in Aufheben is an extremely tall order, even as a level 195(!!) character. Nevertheless, Danger had an idea that he wanted to test out, and he would need, at the very least, Hyper Body to do it. I didn’t mind using an Aufheben entry or two for the day to test something (what else am I gonna use them for…?), so we went in as a duo:
After giving Danger a mini heart attack by activating Zerk and taking 12k damage lines from pre-Auf (Cursed Aufheben) as a result, we killed pre-Auf to make way for the spawning of real Auf. I admit I was quite confused by the idea that Danger had, which was to stand on a middle-left platform to attack Auf from; I thought this was a weirdly super-close position for a squishy ranged character to attack from, but maybe he was onto something.
Unfortunately, Auf just takes up a lot of space. Like a lot. It’s nice to have Danger right there where I can easily re-HB without struggling to get close enough for HB’s sad buff radius to reach, but as soon as Auf does anything funny (including, potentially, merely seducing), it’s game over:
Pretty much, Auf is just not good. The way that the fight is designed pretty much purposely excludes a lot of the level 175+ population of MapleLegends, and no amount of skill, nor planning, nor strategy can change that. That’s just what it is.
Luckily for us, NT1’s end boss is more doable. Here I am, fighting NMM alongside F/P archmages JustACookie & KEKMEISTER (FangBladeJr), Danger, and bowmaster Bowchi:

Wow! I don’t even have to pin…! ✨
Back to Masteria
Okay, okay, I know I said no more HT — and I wasn’t lying! But maybe including Neo Tokyo nonsense was cheating. I promise it’s all business from here on out, though. Very srs bsns. 👩🏽💼💼📈
Like I said, there’s a lot more Masteria to cover here. For instance, I went to Jungle Valley for the Boomer…:

…And Urban Fungus sets:

This map is pretty decent for Boomers, but unfortunately, it’s also the best map for Urban Fungus. And they only make up less than 30% of the population…
Eventually, though, I yoinked my fifth Urban Fungus card, and moved on to Mountain Slopes for the I.AM.ROBOT set:

This is the only map in the game that spawns I.AM.ROBOTs, so I’m stuck here until I get that 5⧸5. Once again, somewhat regrettably, this is also a quite cosmopolitan map: three species are represented, and I.AM.ROBOTs make up a slim majority of ≈56.8% of the population. Also once again, the map design is literally insane. Look at this shit:

I’ve used a red highlighter to outline the footholds (FHs) here, which as you can see, are wildly difficult, geometrically discontinuous, and just generally nonsensical. Note that I’m not highlighting the vertical FHs, despite them being geometrically relevant here.
Of course, the map is called “Mountain Slopes”, so maybe it’s to be expected. That being said, I’ve certainly never seen any mountainous terrain that looks like this! The layout vaguely reminds me of the notion of rectilinear polygons, and the related notion of isothetic polygons. Admittedly, the notion of “isothetic” is somewhat new to me, and I cannot seem to find any good sources that make a clear distinction between “isothetic” and “rectilinear” (the latter also being called orthogonal). In particular, every example of isothetic polygons seems to also be an example of rectilinear polygons, despite the fact that “isothetic” is ostensibly a generalisation of “rectilinear”!
In any case, a rectilinear polygon is very simple: it’s a polygon where every edge (a.k.a. side) of the polygon is parallel to one of the coordinate axes in a given Cartesian coordinate system. Because we’re talking about polygons, the coordinate system is in two dimensions, but in general, it could be of three — or even higher — dimensions, by generalising to orthogonal polyhedra, and thus even more generally orthogonal polytopes.
What you end up with is exactly what you’d expect: a lot of edges that meet at 90° or 270° angles (i.e. right-angled corners), and that’s pretty much it. One way of constructing interesting[12] rectilinear polygons is by taking a grid of pixels, filling in a single pixel, and then proceeding to fill in zero or more additional pixels, such that each new pixel shares an edge with at least one pixel that is already filled in. This is similar to the process of flood filling. In this case, we’ve effectively narrowed our two-dimensional Euclidean plane (with real coordinates) into a two-dimensional space where the coordinates can only be integers; however, it’s still very powerful, as we can make any given pair of edges have an arbitrary ratio of lengths by simply blowing up the polygon (i.e. scaling it up along both dimensions by a single integer factor 𝑛 such that 𝑛 ≥ 2) in a suitable way, and then continuing the flood-fill-like process. So that’s pretty good. Similarly, voxels and their higher-dimension analogues are natural spaces to embed orthogonal polytopes into.
But, even putting aside the fact that we’re actually dealing with polygonal chains (not polygons necessarily), the footholds of the Mountain Slopes are clearly not rectilinear! Not even close!! What makes the Mountain Slopes so strange is that they also include what (at least, to my eyes) appears to be exactly one extra pair of axes. This is where the generalisation of “isothetic polygons” (or rather, isothetic polygonal chains…) comes in.
Like I said, I can’t find any good resources on isothetic things. Most sources seem to use it as a synonym of rectilinear, which is extremely unhelpful. That being said, the English Wikipedia article does give a brief definition:
An isothetic polygon is a polygon whose alternate sides belong to two parametric families of straight lines which are pencils of lines with centres at two points (possibly the point at infinity).
Okay, that sounds simple enough, right? The same article provides a little illustration that I think is useful, albeit regrettably low-quality:
What’s kinda interesting here is that the points don’t have to be at infinity, according to this definition. When, in the Euclidean plane, we look at a pencil of lines defined by a single point that the lines all pass through, the various members of said pencil look very much not parallel to one another: each member is defined by essentially a single angle (∈ [0°, 180°)[13]), and the result is that two members with angles that differ significantly are going in very different directions (hence “very much not parallel”). But, as we move our perspective further & further away from the point that defines the pencil, this effect becomes weaker & weaker. The further that we are from the pencil point, the more that we lose sight of pencil members whose defining angles are significantly different from the defining angle of the pencil member that passes through the point that our perspective is focused on, because those pencil members have diverged by an increasingly large amount as we get further from the pencil point. This is basically just a description of perspective in the geometric sense (see also).
The point is that, as we lose sight of the diverging pencil members, we can only see pencil members whose defining angles are in a very narrow interval, and that interval gets narrower & narrower as we continue to move away from the pencil point. This causes the members of the pencil to locally look more & more “parallel”, and the notion of “point at infinity” codifies the extreme limit of this process by allowing a pencil of lines that pass through a “point at infinity” to define what is essentially the pencil of lines that are parallel to a given line. You can think about it the other way around, as well: if we imagine that this pencil of parallel lines eventually meets at some point, then we must forgo the Euclidean-geometrical notion that some lines (called “parallel” lines) intersect at exactly zero points, and instead make the space projective. This reifies the notion of a vanishing point: when you stand upon, and look directly down the length of, a perfectly straight railway track, the two sides of the track appear to converge as they move away from you, eventually vanishing at the limit of your vision — seemingly being arbitrarily close together at that point. In a projective space, two “parallel” lines do indeed meet at a point (in this case, a point at infinity), just as they appear to. This has the nice property that, unlike in Euclidean space, any two distinct lines meet at exactly one point. That’s it — it’s always just one, no more & no less.
This is what makes Wikipedia’s definition of “isothetic” work: we can pick the two points such that they are both points at infinity, and then orient them so that their associated pencils are orthogonal to one another. The result is the special case of “rectilinearity”: the resulting pencil members (and thus the edges of the polygons, or of the polygonal chains) are all parallel to one of the Cartesian coordinate axes. But like I said, what makes this interesting is that we don’t have to pick points at infinity — and even if we do, they need not be orthogonal! So we can probably make some pretty messy-looking stuff that is indeed “isothetic” per Wikipedia’s definition.
In our case, we need to stretch the definition of “isothetic” to allow us to pick a number of points that isn’t two. The basic intuition is that of dividing the plane: imagine that we have just the plane, and no coordinate axes. Then, we add a single axis (call it the “𝑥 axis”), which so far is “just some arbitrary line”. This axis divides the plane “in half” in the sense that some points in the plane are on one side of the axis (later, these will be “points with a positive 𝑦-coordinate”), and some are on the other (later, these will be “points with a negative 𝑦-coordinate”); thus, a pair of half-spaces. But we can go further: we can divide the plane in half yet again by adding a second axis that is orthogonal to the 𝑥 axis — call it the 𝑦 axis. By dividing in half again, we have not two halves, but rather, four quadrants. Normally, this is the point at which we stop. But we can keep going. We’re going to need the number of axes to be either a natural-number power of 2, or else 0. To see why, we can try adding just one more axis, for a total of three — call it the 𝑧 axis. Where does the 𝑧 axis go? If we put it in a “halfway” position between the 𝑥 and 𝑦 axes, we have two choices, and either one gives us asymmetry: some of the divisions of the plane are “twice as large” as the others. In other words, we only bisected two quadrants, leaving the other two quadrants whole. So we can’t just add a 𝑧 axis; we also need a 𝑤 axis. The result, now that we have four carefully-placed axes to repeatedly bisect the plane, is not quadrants, but octants. That being said, these “octants” look slightly different from the usual octants in three dimensions…
Of course, because we’re in two dimensions, this is arguably an abuse of the term “coordinate axis”, as having more than two such axes overdetermines each point in the plane. But we can get away with it for two reasons:
- We don’t need to make use of all axes when we uniquely determine a single point. For example, a given point might have a coordinate pair (𝑥, 𝑦), and another one (𝑧, 𝑤). Either pair is, on its own, enough to uniquely distinguish the point — they’re just two different ways (perspectives, if you will) of doing it.
- The use of the term axis (and the plural axes) here is intentionally consistent with the usual definition of rectilinear.
Think of it like… cutting up a pizza. Except that we only allow cuts that cause all currently-existing pizza slices (which, at first, is just a single slice that encompasses the whole pizza) to be exactly bisected. Also, the pizza is infinitely large (cool!) and doesn’t taste like anything (disappointing…).
So, instead of choosing 21 points, like in Wikipedia’s definition, we can choose 22 points. In order to do this, we also have to replace their use of the word “alternate” with just arbitrary selection; when there are only two choices, and choosing the same thing twice is basically a no-op (you merely get a degenerate edge), alternation and arbitrary selection are effectively the same thing anyways. Like with rectilinearity, we choose all points to be points at infinity. Also like with rectilinearity, we choose the points carefully so that they come in orthogonal pairs.
Does that all make sense? It’s a fancy way of saying that each line segment that defines a given FH in Mountain Slopes is exactly one of the following:
- Vertical.
- Horizontal.
- Diagonal (at an integer multiple of 45°) from the top-left to the bottom-right.
- Diagonal (at an integer multiple of 45°) from the bottom-left to the top-right.
And, in this way, they form polygonal chains. Moreover, this is closely related to how isothetic polygonal chains work. By having a little too much fun with where the polygonal chains are located, where their edges emerge, which pencil each edge is taken from, how long each edge is, etc., whilst simultaneously keeping everything isothetic (in the generalised sense here), Mountain Slopes is given its distinctly artificial, unnatural, and unnerving appearance & terrain.
Did I have to explain how a projective plane works to make this point? I can’t remember. What was I doing again? Oh, right. Mountain Slopes…
What is that tiny lil island doing there? It haunts me.
At least I finished the I.AM.ROBOT set…:

Ouh! Lightbolb!!! You know what that means…
Tier 8!!:
Ready for more insane Masteria maps? I headed up to Mountain Cliffs for the Gryphon set. This map is nice insofar as it is monocultural, but there’s just the slight issue of, you know, Gryphons flying around willy-nilly. Oh, and the insane map layout. Oh, and remember those teleporters in the Deity Room? Well, they’re back!

Luckily, the Gryphons took pity on me and actually had pretty nice card droprates.
Oh, and now that I’ve racked up some Gryphon kills, I’m doing quite well on the NLC quests. I figured, I’m going to be hunting almost all of the Masteria monster species anyways, so I may as well do the quests, right? rusa’s journey was very different from that of, say, my pugilist tarandus; I skipped most quests, instead opting for maximum PQ punishment enjoyment. This was a whole lot of fun, and I met a lot of people, but it did leave my quest journal in quite a mess.
With 200 each of Gryphon & Electrophant kills, I completed “Cleaning Up the Streets”:

Yep! This quest is a guaranteed Onyx Blade if you’re a warrior. The Onyx Blade, a level 45 warrior-only one-handed sword, is not a particularly special weapon; heck, you can even just buy it from the NPC Kyle, who is standing not too far from the quest NPC Lita Lawless! Nevertheless, it’s not bad either, and it has kind of a cool icon:
![]()
The requirements for wielding it are unfortunately very ordinary: it requires ≥145 STR. Luckily, I have enough STR on my equips to show what rusa looks like holding it. :P
And, naturally, I completed Urban Warrior, to obtain the Warrior Throne:

Ah yes, a portable, comfy blue seat, fit for a warrior.
At this point, I’ve pretty much covered the entirety of the NLC region (including MesoGears), as well as the entirety of the Prendergast Mansion that I started with. But that still leaves a fat chunk of Masteria! It was time to venture into the Phantom Forest, and even trek up the Crimsonwood Mountain!
The Phantom Tree set is another set that you just get passively. I was already like 3⧸5 from some experience hunting Bigfeets, so this brought me to 4⧸5.
I was of course also questing, so I was going to need to trek up and down the mountain at least a handful of times. This proved fatal for our intrepid warrior rusa, as my JQing abilities harbour some infirmity…:

Don’t worry, I think I only died like once or twice in total. It’s fine. #normalisedying
Once I did make it up the mountain (or at least, partway up…), I found that the Crimson Trees — once my sworn enemy for their stinginess in shedding their wood — were now actually quite generous, at least with the card drops…:
I also found out that the interior of the Crimsonwood Keep houses some maps that are each dedicated to a single Crimsonwood Mountain monster species. I went to Stormhall to fight the Stormbreakers there, to get their badges for The Brewing Storm:
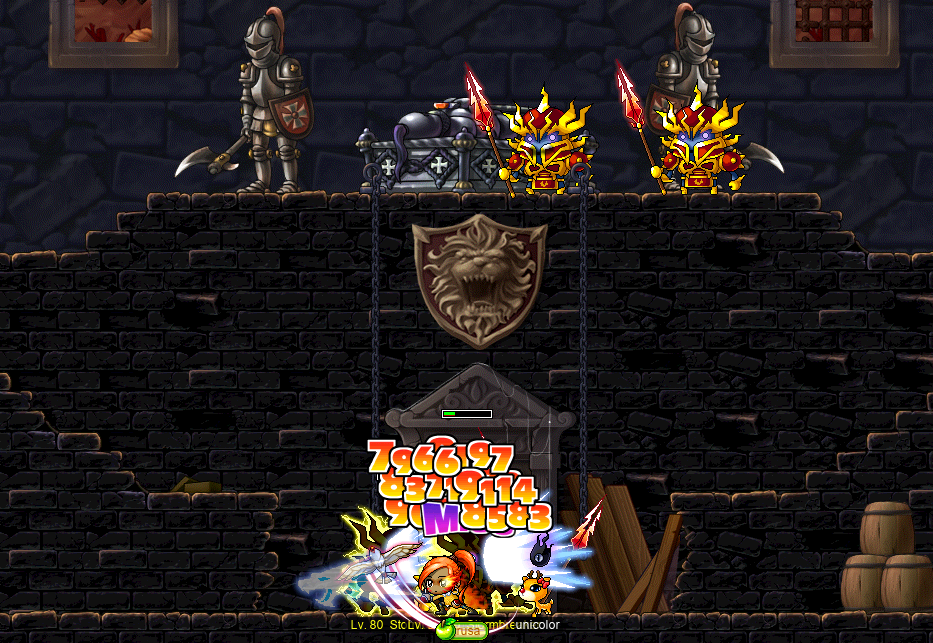
I had to go back down the mountain again — and then, of course, back up… So I took this opportunity to stop at The Evil Dead for the Elderwraith set.

And, whilst I was hunting there, my good friend the Headless Horseman stopped by:

We might be stabbing each other in this image, but it’s just a bit of sparring amongst friends. We had teatime afterwards.
And Danger, who spends a lot of time up here on the mountain doing the badge exchange, offered to help with some card sets!! So we went to the Cavern of Fear to start on the Stormbreaker & Firebrand sets…:


…Before deciding that it would be better to try The Path of Strength (PoS, not to be confused with piece of shit):
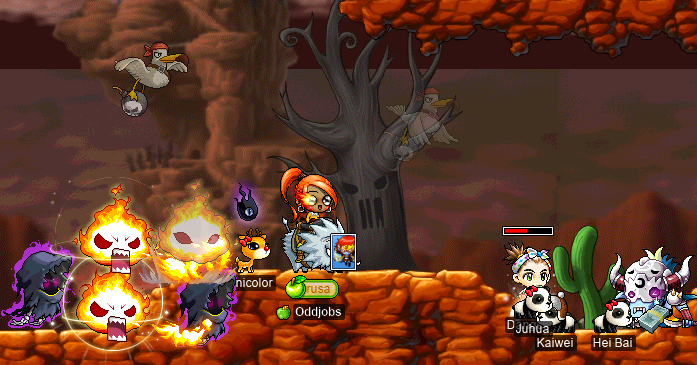
Oh yes, we can’t forget the Nightshadows!:

In another trip back down & back up the mountain, we stopped at Swamp Bog to do the Leprechaun set right quick:

And now, once again at the top of the mountain, to The Path of Peril for the Typhon…:

…And Baby Typhon sets:

Of course, anyone who has been to The Path of Peril knows exactly why it’s called that: the platforms are difficult to manoeuvre, sparse, the Typhons constantly threaten to YEET you off of the map, and when you inevitably meet your fate, you have to climb back up. Kind of annoying. Nevertheless, with Danger’s assistance, I was able to complete both sets.
And with that… I think I’m pretty much done? With Masteria?? Finally??? Obviously, I don’t have every single set. I didn’t do Wolf Spiders, Bigfeet, Headless Horsemen, nor even Crimson Guardians. But those are… probably not worth it for just T10. 🙂
Leaving Masteria (finally)
Next up on GrayNimbus’s list is Upper Aqua Road. I already had three of these sets completed (Scuba Pepe, Krip, & Pinboom), but the rest are definitely worth getting as well. So we headed down the Helios Tower to politely ask the critters of the sea to give up their cards. Or else.
First stop was Fish Resting Spot, a cute little (actually, not that little) map surrounding a rectangular enclosure. This map is split almost 50⧸50 between Cicos & Seacles, but it’s actually the best single map for either species individually. That’s a bit annoying, but it just means staying there until you have both sets:


Over in Big Fish Valley (and in Sand Castle Playground, as well), we did Bubble Fish…:

…And Flower Fish sets:

And, although I already had the Krip set, I needed like two more Mask Fish cards:

Just one map west of the Aquarium lies Forked Road : West Sea, where we did the Freezer…:

…And— Wait a second. Didn’t I already do the Freezer set? I swear to g— oh… I see now. There are actually three (yes, 3) distinct monster species in MapleLegends with the exact name Freezer. Besides this here walrus-looking Freezer, there’s also the Freezer card set that I did in the CBD region of Singapore above (which basically looks like a dark grey blob dood with a fire extinguisher on its head), and the Freezer that you fight as a marks(wo)man as part of the questline to unlock your Frostprey summon. In this last instance, I’m not sure why the monster version is called Freezer rather than the more obvious Frostprey, especially given that the names for the Phoenix monster and the Phoenix skill are identical…
Oh, right. And the Sparker set, of course:

Then, to Crystal Gorge for the Poison Poopa…:

…And Jr. Seal sets:

Poison Poopas really need their good card drop rate to make up for the fact that they are so hard to find. Crystal Gorge is the best map for them, but even here, they make up just ⅓ of the population at just 7 spawnpoints.
Whew. That was very many card sets!! I thanked Danger for helping me with all these sets — including many that weren’t even in Masteria! — and came back later to do some card-hunting by myself again.
There’s still just one more set for this region, as I’ll be skipping over Seruf. Not-so-poisonous Poopas fare a little better than their poisonous counterparts, as they make up ≈57% of Ocean I.C:

And that’s Upper Aqua Road! I will not being doing Deep Aqua Road! Thank you very much!! (Looking at you, Bone Fish…)
So, where to next? The travel guide says Omega Sector, so I guess it’s alien time.
I ended up finishing the Barnard Gray set (which I already had 3⧸5 of, or something) at Barnard Field, where I was also hunting Chief Gray:

I also did the sets of the purple alien doods that are often found along the Boswell Field, such as the Mateons of Off-Limits…:

…The Plateons of Boswell Field II…:

…And the Mecateons of Boswell Field V:

I also fought many Mecateons at Defeat Monsters (great map name…) in the pursuit of the MT-09 set. I did finish the MT-09 set, but I seem to have forgotten to take any screenshots. MT-09s only spawn in Defeat Monsters, have just three spawn points, and each spawn point has a 33-minute timer. So it’s a little bit like hunting area bosses, but not really.
In the process of finishing the Mateon set, I somehow got them to drop two Red Jangoon Skirts at the same time:

Then, it was time for the rest of the Grays. Like the Ultra Grays…:

…And the Chief Grays:

And, while I was here hunting monsters in the Omega Sector anyways, I thought I’d do the Artificial Combatant Zeno questline. I got lucky with the initial Wave Translator being a functional one, so I really just needed to defeat Zeno now. One time that I checked Gray’s Prairie, I ran into OSS-locked hermit snakewave (yeIlo, bak2monke, VAPORWAVE), who was looking for Zeno as well!:

snakewave helped me get a timer for the one Zeno kill that I needed, and so I killed the big bad robot alien!:

Oh, yes! Zeno drops Glowing Whip!! This one was 68 WATK clean, which is not great… 2 below average… But that’s 1 more Glowing Whip than the number of Glowing Whips that I expected to get! So let’s boom it…

Transcription of the above image
Glowing Whip (+4)
- Req lev: 40
- Category: one handed sword
- Attack speed: fast [4]
- STR: +10
- Weapon attack: 85
- Weapon def.: 3
- Speed: +17
- Number of upgrades available: 0
Oooh… Actually not too bad! I got a bit tired of failing 30%s[14] towards the end, so I slapped a 70% on it. But still, purple-glowing. A purple-glowing Glowing Whip. A purple Glowing Whip. Something like that.
Oh, and finishing the last of the Omega Sector card sets (besides Zeno’s…) got me a litebolb!!:

Yell heah… Tier 9 😎:
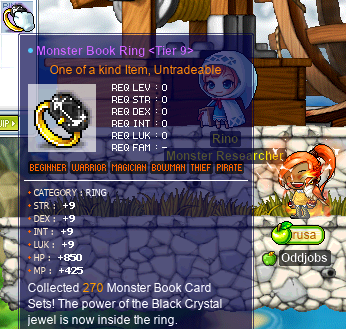
And the grind continues! Now that I was done with the Omega Sector, the next destination on the travel guide was El Nath between the Forest of Dead Trees and The Door to Zakum. This is only one slice of the El Nath region, but GrayNimbus picks out this particular slice as being quite favourable, in contrast to the rest.
Dagger sader inject (inhale, insist, vvvv, DexBlade, Pitiful) was also doing some card-hunting of his own, so we decided to team up for some El Nath card sets. However, inject had already done the “Forest of Dead Trees onwards” region, so we instead opted for the other side of the cliffs. In my experience, El Nath cards are really only “bad” once you get to the cliffs. After that, you get to the Forest of Dead Trees, and before that, it ain’t half bad either.
So we headed to Watch Out for Icy Path I — just east of El Nath proper — to do the Jr. Yeti set:

Along the way, one of the Jr. Yetis dropped a Crescent Polearm, so I gave it a whirl:

It’s pretty slow (speed 8 clean, 6 with booster), but it ain’t too shabby if you’re just killing Jr. Yetis with it…
Once we were both 5⧸5 Jr. Yeti, we headed towards Cold Field II. Along the way, whilst passing through Cold Field I, we stumbled across a corpse laying in the snow:

Oh dear. R.I.P. j0hnny (daggerknight, Gumby, Kimberly, Jonathan)… 🪦
After giving j0hnny a proper burial, we moved on to Cold Field II, where we discovered a suspicious-looking snow-covered bush. With my curiosity getting the best of me, I leaned into the bush to see if it was hiding something. And it was: I found myself transported to The Crown-Flyer.

A strange name for a map, sure, but it does make sense. You’re likely familiar with Scuba Pepes, Jr. Pepes, Dark Pepes, Yeti & Pepes, and Dark Yeti & Pepes. But have you ever seen… just a Pepe? In honesty, probably most MapleStory players haven’t seen one, because they are precinctive to The Crown-Flyer. With the little golden crowns on their little spheniscid heads, combined with their unrestrained need for speed, and the distinctive triangular ramp at the bottom of the map, there are actually quite a few flying crowns in this map.
Once we both finished the Pepe card set, we moved to Cold Field I for the White Fang…:

…And Hector sets:

Cold Field I has more than thrice as many Hectors as it does White Fangs, but by this point, this was exactly what we needed. We already had some White Fang cards from The Crown-Flyer, and for some reason, the Hectors would just not give up their cards! Instead, they littered my inventory with cape for DEX 60% scrolls…:
![]()
Eventually, the Hectors allowed inject to get that 5th Hector card, and that was that. Unfortunately, that’s all of the pre-cliffs El Nath card sets. Short but sweet.
We tried going to Sharp Cliff II for the Dark Pepes, Dark Jr. Yetis, & Dark Yetis (oh dear, that’s a lot of species)…:

…But gave up after a bit, as inject had to leave anyways. :P
And that’s all for now! Tier 10 for rusa Soon™!! ❤️
Footnotes for “روسا”
-
[↑] In MapleLegends, at the time of this writing, Dragon Blood heals the DK. Originally, and in other versions of MapleStory, it does the opposite. See the “DK rev. 3” section of pt. xcix of this diary.
-
[↑] In the original system, stage VII is the highest stage; however, many lects go beyond this stage by making yet further distinctions within their basic colour vocabulary.
-
[↑] Actually, yeah (archived). The guide gets the quest name slightly wrong, though: it’s actually simply “Special Delivery”. In this quest, we find out that Ludmilla is actually the stuck-up, extremely rude wife of Jonas Prendergast. I guess the Sophilia Dolls are actually dolls of Jonas’s late daughter, Sophilia; the death of his young daughter must have driven him to try to bring her back… somehow… as an undead toy, or something??? In any case, Ludmilla has zero sympathy (likely due in part to being Sophilia’s stepmother, and in part to just being cold-hearted in general…), and is just miffed that Jonas won’t pay attention to her because he’s too busy in the workshop, probably doing dark toy magick or some shit. Thus, she wants five Cherry Pies (Jonas’s favourite food) as a way to lure Jonas out of his workshop, and has four Heartstoppers to reward us with.
-
[↑] In case it wasn’t already obvious, we’re including the British Isles here, despite them not being geographically contiguous with Eurasia.
-
[↑] Written anachronistically using post-1918-reform spelling.
-
[↑] Originally written & published for piano, this piece was later fully orchestrated.
-
[↑] Not counting the quests that are just the repeatable boss entry quests, e.g. the “Asia” quest that merely warps you to the map that allows you to sign up for NMM.
-
[↑] I hate to bust out all of the highly technical terminology all at once, but let’s face it: if you have to ask what “pp pupu” means, you’ll never know.
-
[↑] We suspected that this might be an intentional disabling of respawns until an “run” is consumed. What I mean is, like almost all non-area bosses, 2nas can only be run by a given PC up to a maximum of twice daily. So there has to be some logic that decides what counts as a “run”. In this case, simply entering the 2nas map doesn’t count; you have to defeat Dunas Unit (and thus spawn the real 2nas) to trigger a “run”/“entry” being recorded by the game server.
That being said, because killing Dunas Unit coincides with the disappearance of both Dunas Unit & fake 2nas, and because both of these monsters actually have spawn points built into the map (at least, according to the ML Lib), it seems more likely that the absence of Dunas Unit & fake 2nas causes the respawn logic to observe less map congestion (fewer live monsters in the map), thus encouraging it to respawn monsters to keep the map population back up — just like in any ordinary map. Then, some of the spawn points in this map are simply marked as “no respawn” in the map data; for example, it would obviously make sense for the Dunas Unit & fake 2nas spawn points to have such an attribute, as those obviously shouldn’t respawn. This attribute may be present on as many as four of the five Imperial Guard spawnpoints that are — again, according to the ML Lib — present in the map data.
-
[↑] Definitely a real word.
-
[↑] I use the word “interesting” here because these polygons have special properties, like being simple. This is, needless to say, not the only way of constructing rectilinear polygons.
Rectilinear polygons — and their higher-dimensional analogues — are very, very frequently concave. This is because rectangles are as good as it gets for convexity, and rectangles are boring!!
-
[↑] Or [−90°, 90°), or whatever convention you like. Notice how this “wraps around”, similar to modular arithmetic, but with only addition/subtraction. So with [0°, 180°), we might have an arithmetic progression like e.g. ⟨177°, 178°, 179°, 0°, 1°, 2°, ⋯⟩.
-
[↑] Seriously, I hate when 30% scrolls fail but leave the equipment item intact. If I’m using a 30% scroll on some shit, it better either pass, or get this shit outta my sight. Pick a side!!!
(…cnvpstdf…)
cnvpstdf

Transcription of the above image
Edonnt: booooooooooooooooooooooo
blonkers: boo
Edonnt: I am horn tailing tonight
will I clear
blonkers: nice!
yea
why not
Edonnt: idk I havent played video game in a month
blonkers: by choice or nah?
Edonnt: choice
blonkers: nice
Edonnt: I have been playing splatoon on the nintendo switch
blonkers: i guess that’s not video game

Transcription of the above image
Diggy: how high
Supernovas: exteordinarily [sic]
Diggy: superb
Supernovas: oh wow thats not even close to the right spelling huh
Diggy: LOL
rusa: lmfao
Woook: that high huh
